On this page
What you’ll need to install
1-2 People*
10-20 mins
Tools
- Your tape measure (metal is best)
- Your step ladder
- A cordless drill with a Phillips head drill bit
- A 3 mm drill bit
- A pencil
- *For large blinds it is best to have a second person help hold the blind in position.
Before you get going
If you're drilling into wood, follow the steps below.
If you're drilling into plaster, you have two options:
Use a stud finder to locate where your wall studs are, then follow the steps below.
Use a Ramset 10 mm Grip Hollow Wall Anchor, which will help secure your blind to plaster
If you're drilling into concrete, stone, brick or tile, use a Masonry drill and appropriate plugs, anchors or screws
If you're just not sure, call or email us so we can help!
Verify Measurements: Before installing your blinds, double-check the final measurements of the supplied products to ensure they match your order and fit the intended space. If there is any doubt, notify us within 7 days.
Confirm Installation Items: Ensure you have all the necessary components and tools as specified in the installation guide.
Follow the Instructions Carefully: Adhere to the provided installation steps, particularly those indicating where two people are required for safe handling.
Inspect the Area: Perform a visual inspection of the installation area to identify and mitigate any risks to surrounding surfaces, objects, or structures.
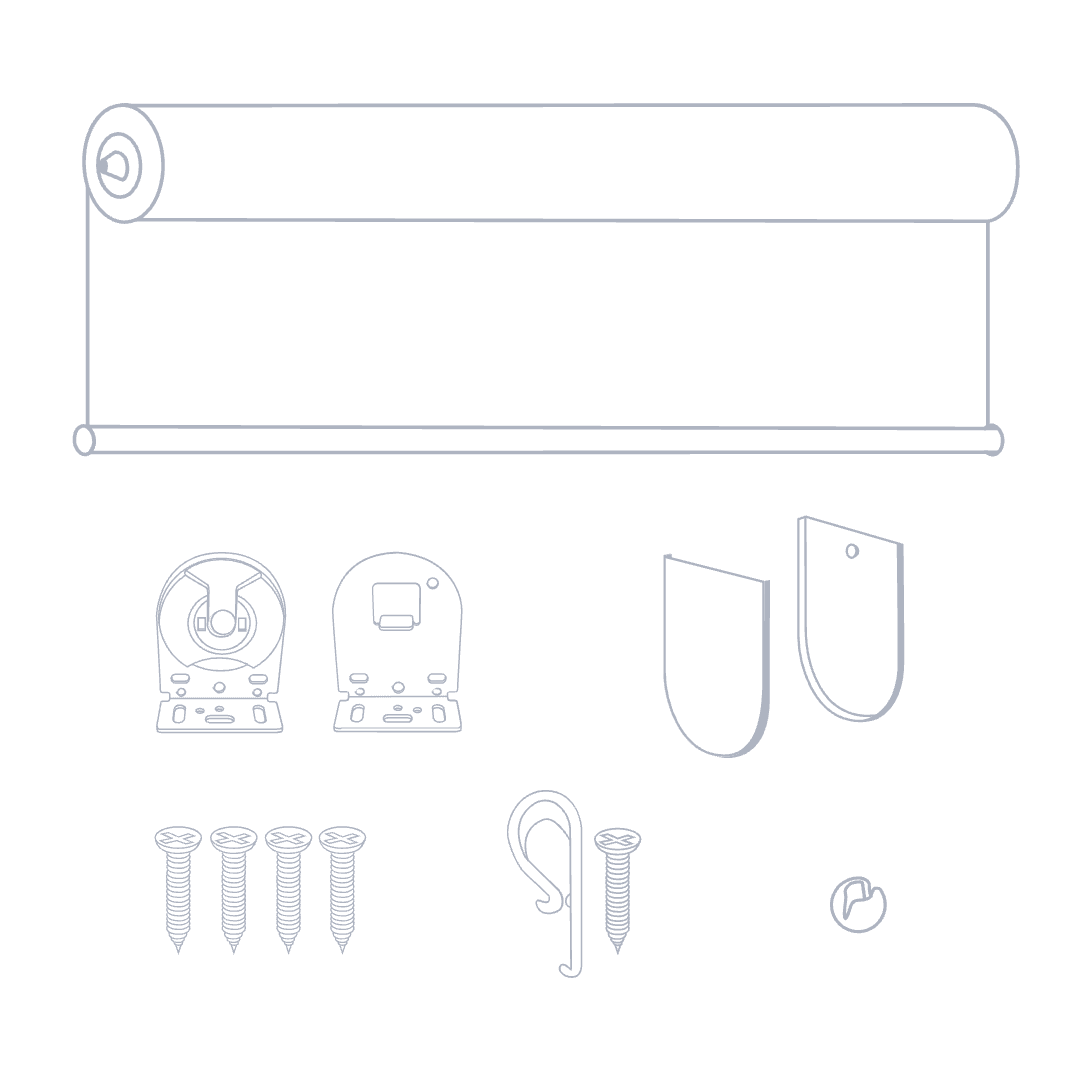
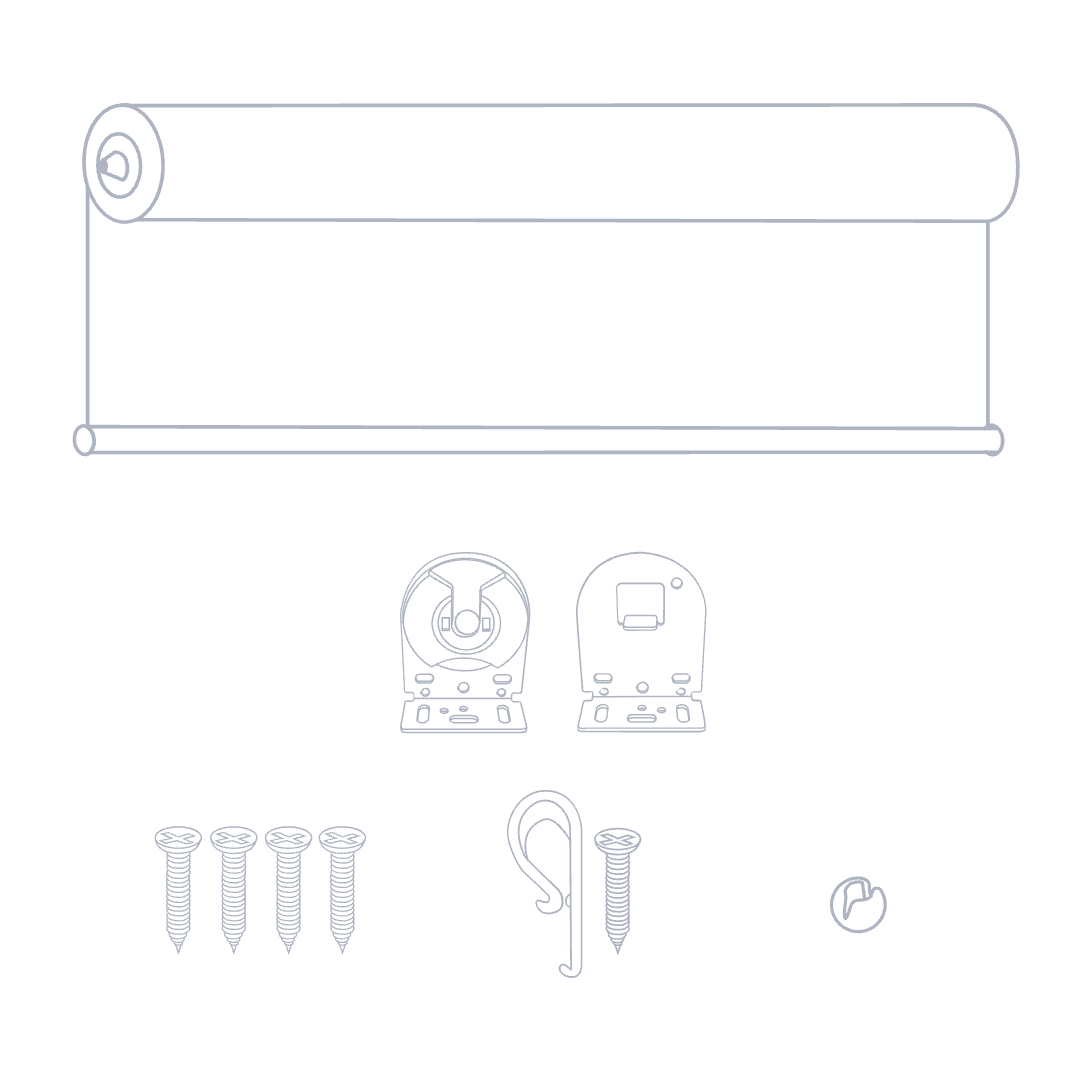
Your custom kit:
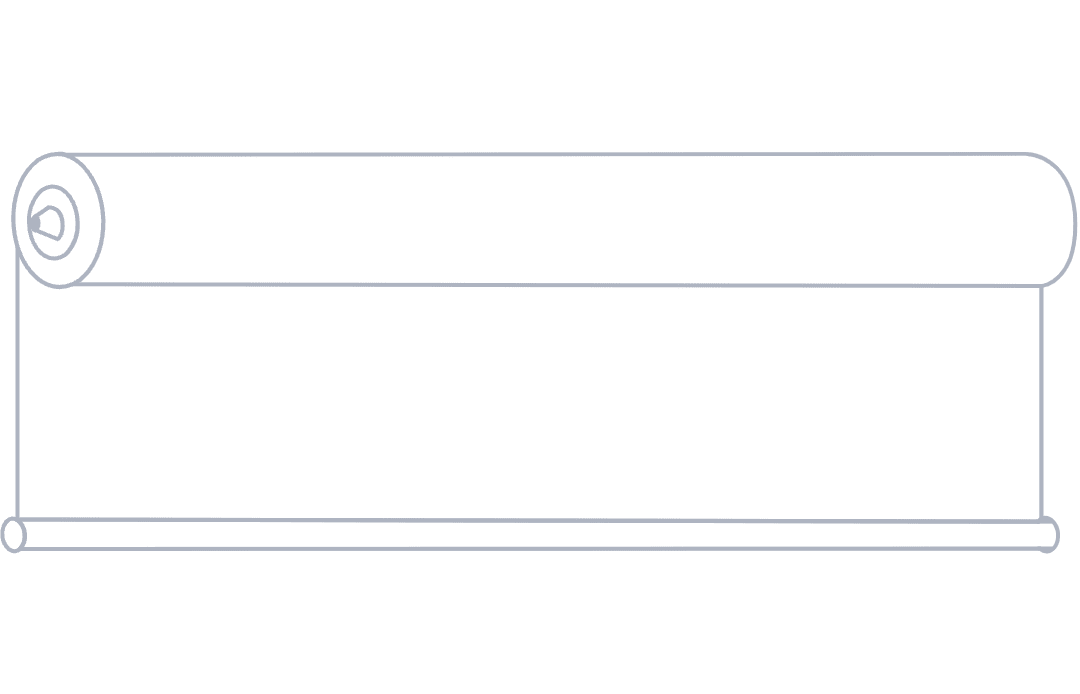
A
Your roller blind
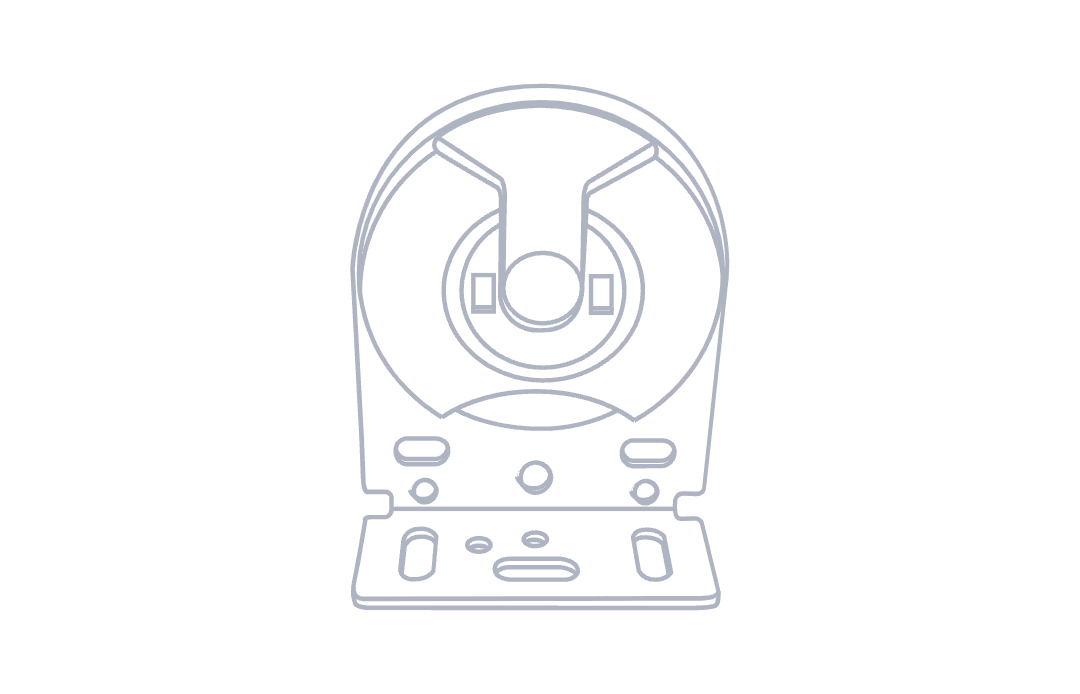
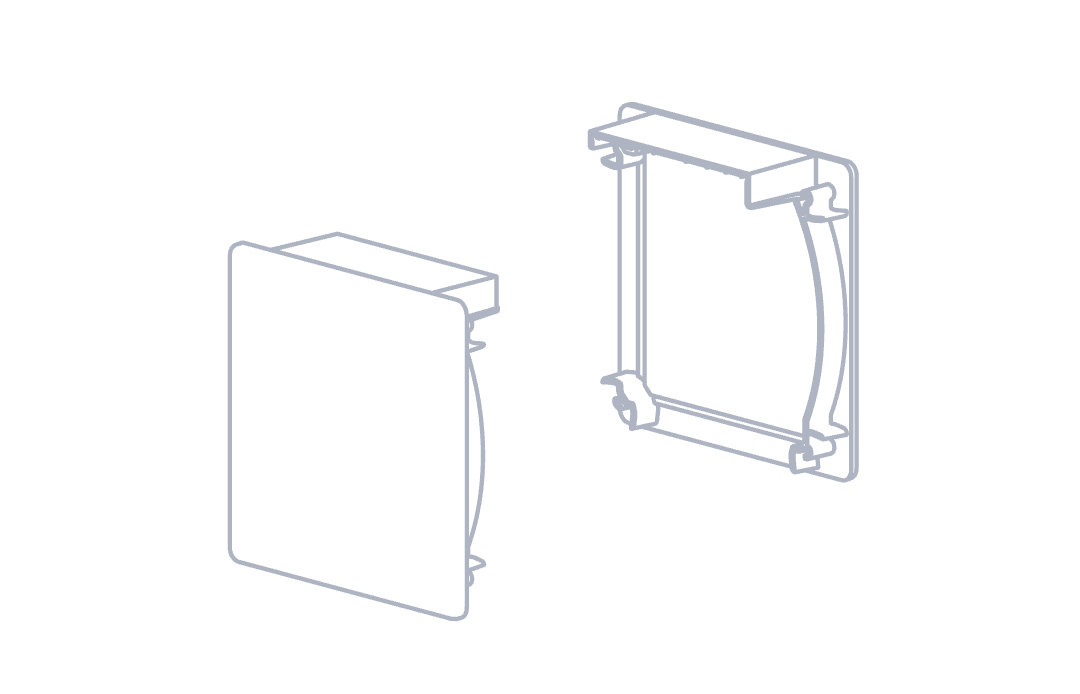
B
A chain drive bracket
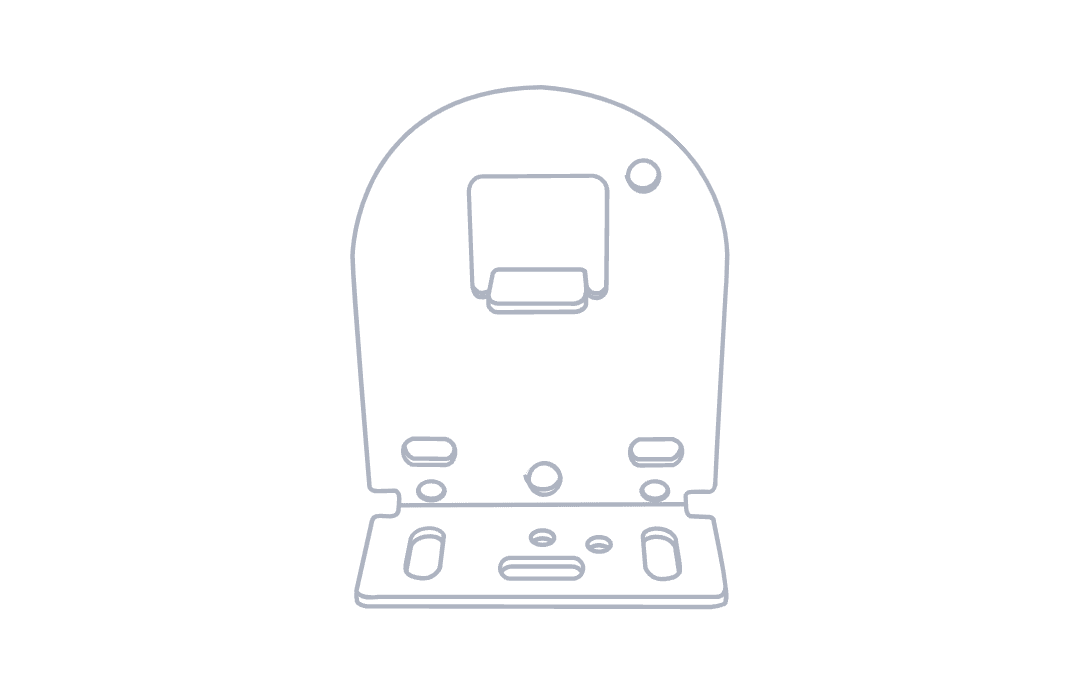
C
A pin end bracket
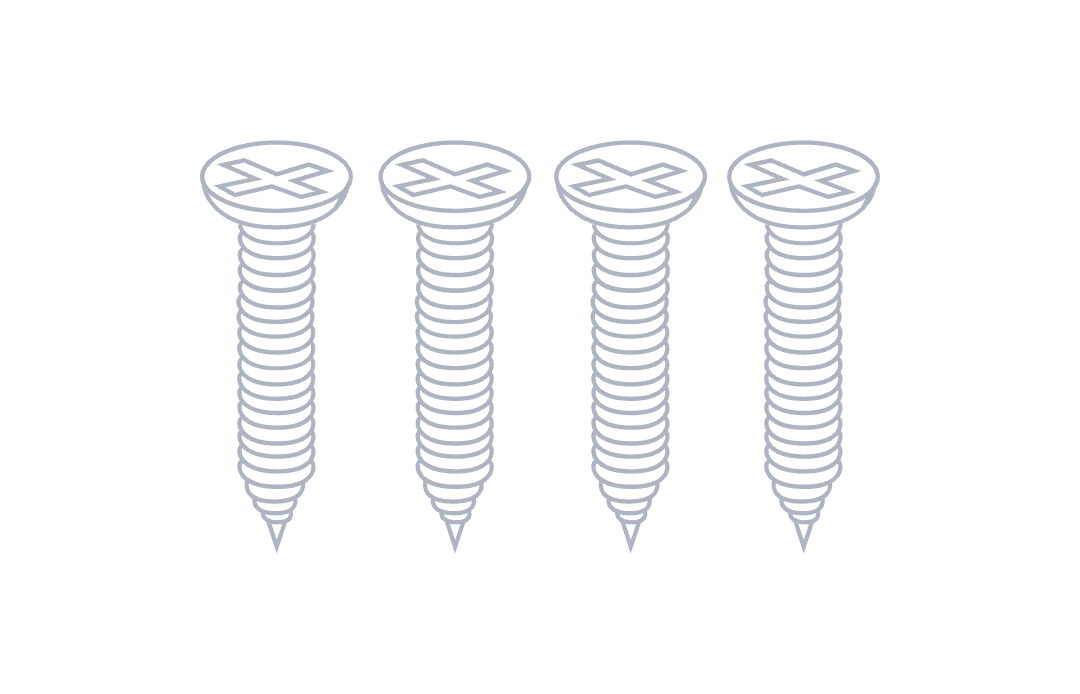
D
Screws

E
P clip (for child safety)

F
A ball stopper
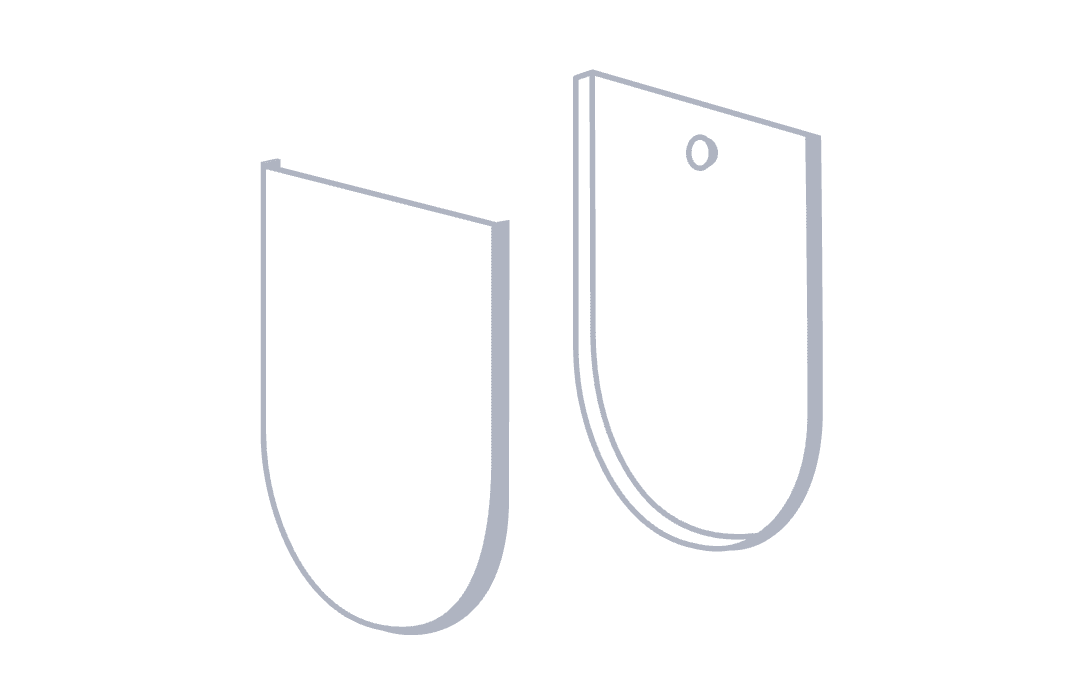
G
Bracket covers (face fit only)
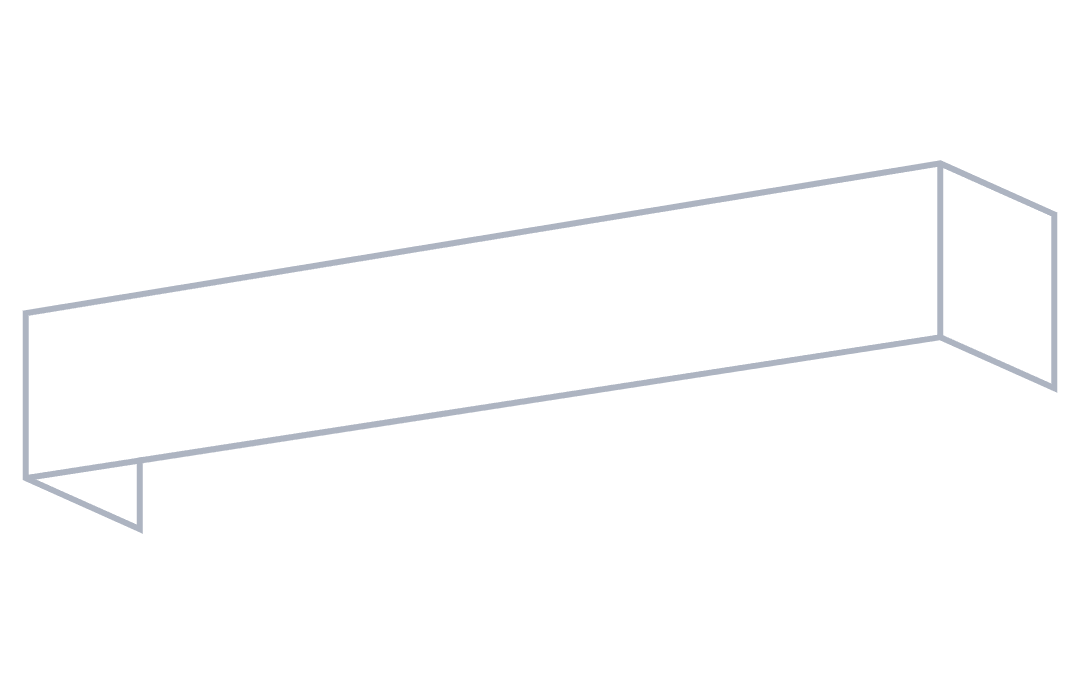
H
If you ordered a pelmet: Your pelmet
I
2 pelmet returns (face fit only)
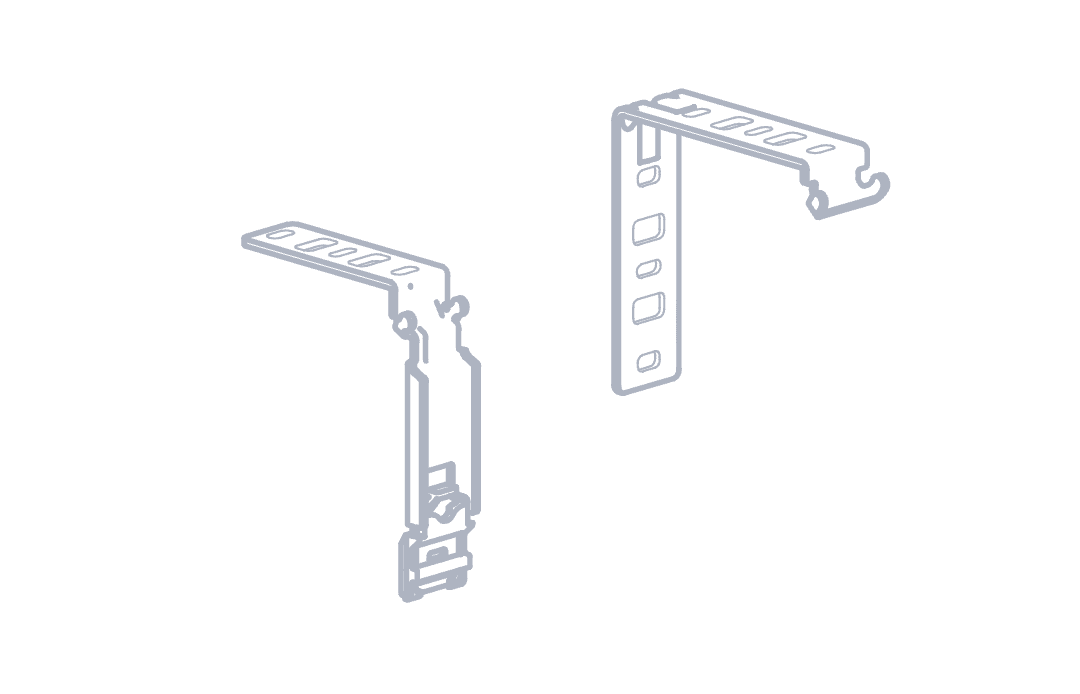
J
2 pelmet sprung brackets (recess fit only)
OK it's time to start installing, let's take it step by step

A
Unpack your custom kit, and lay out your roller blind on a clean floor, under your window.
B
If you ordered a pelmet, now's the time to slip your brackets into the pelmet returns, as you will be mounting them as one in steps 2 and 3.
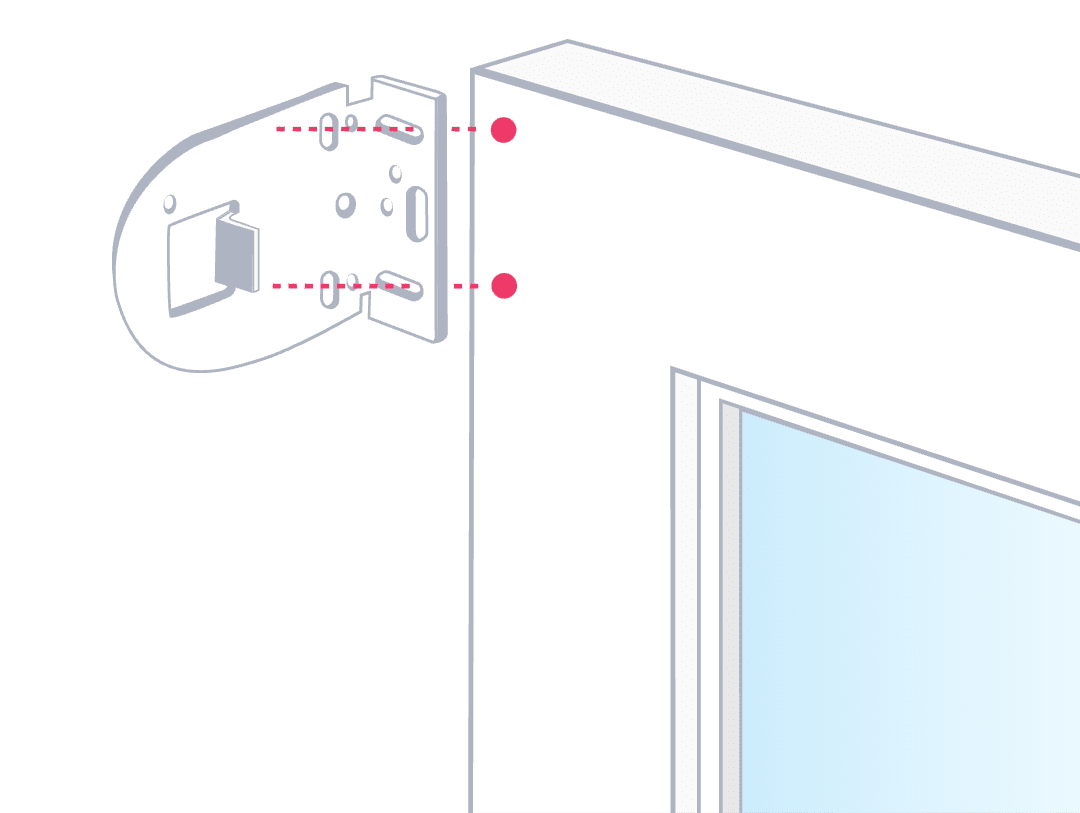
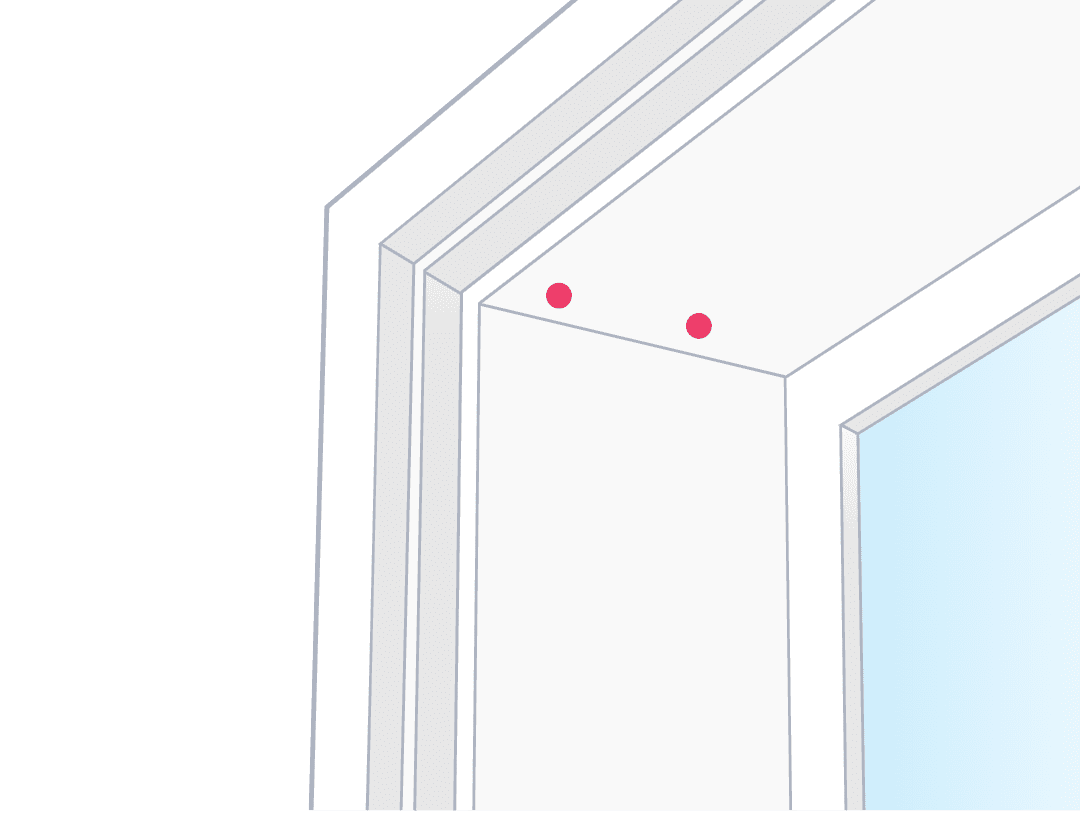
A
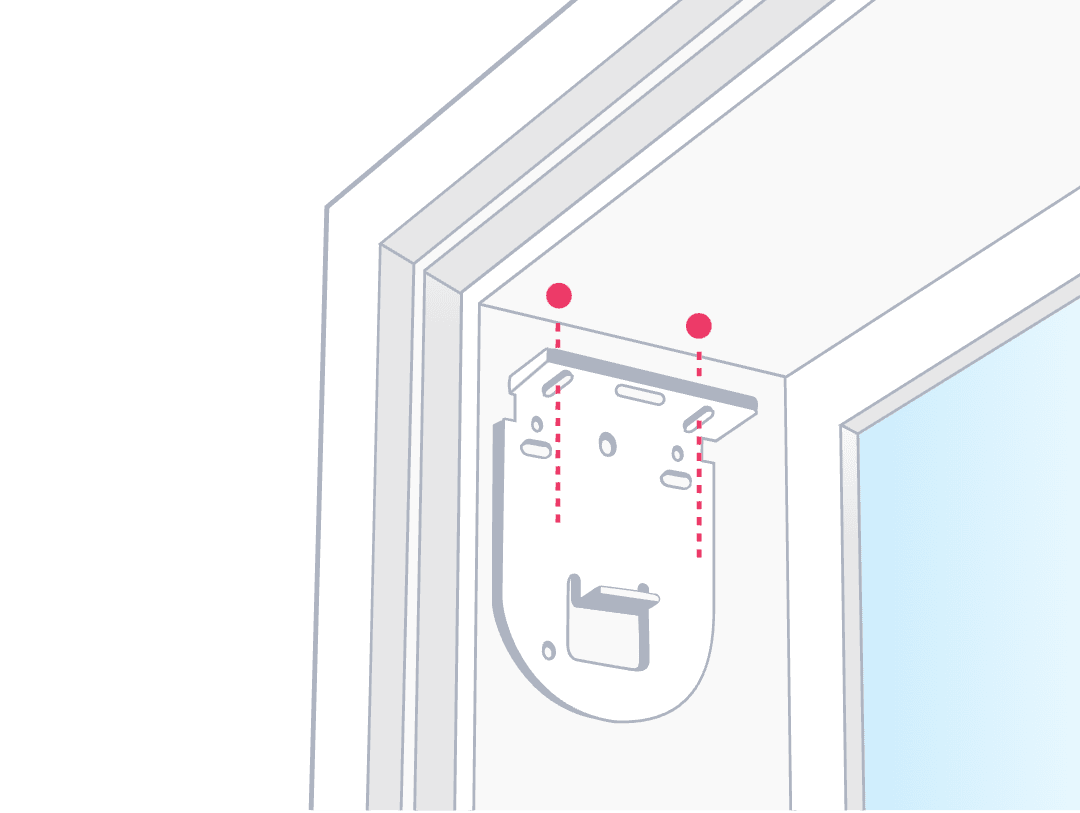
Take your pencil and both brackets. Lift each bracket up into position and mark two level dots where the screws will attach the bracket to the frame.
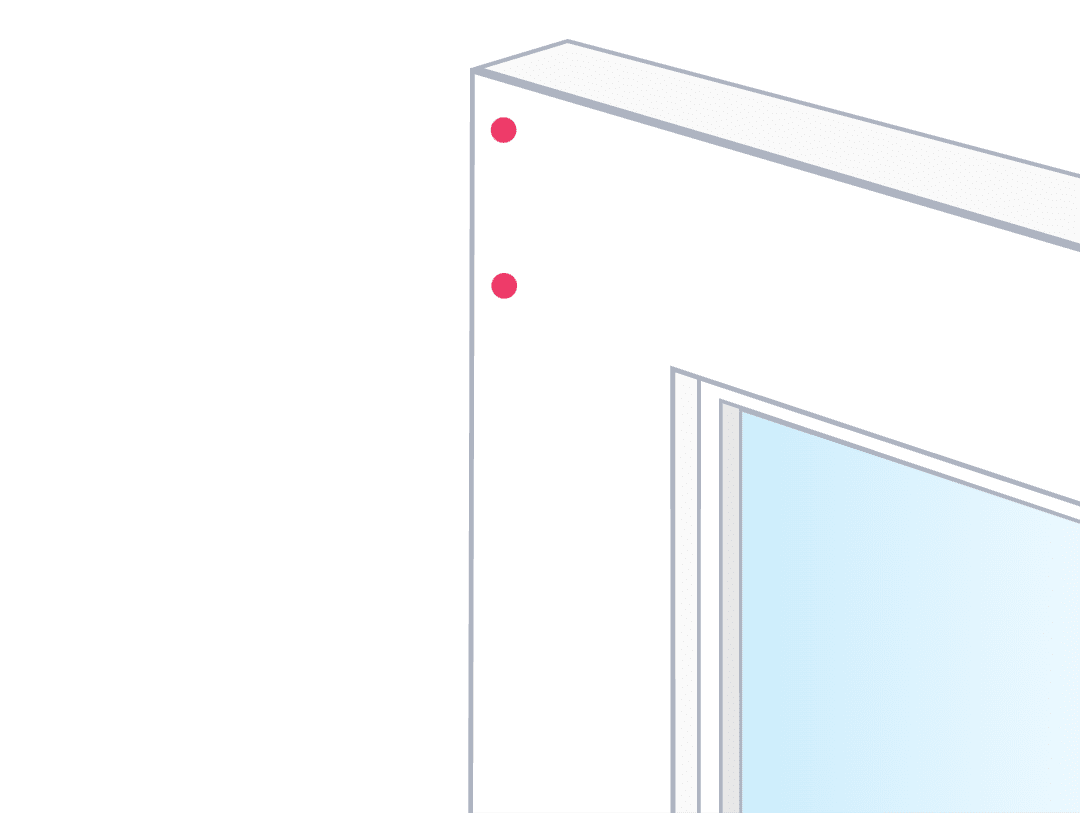
B
This will be in the top corners of your frame.
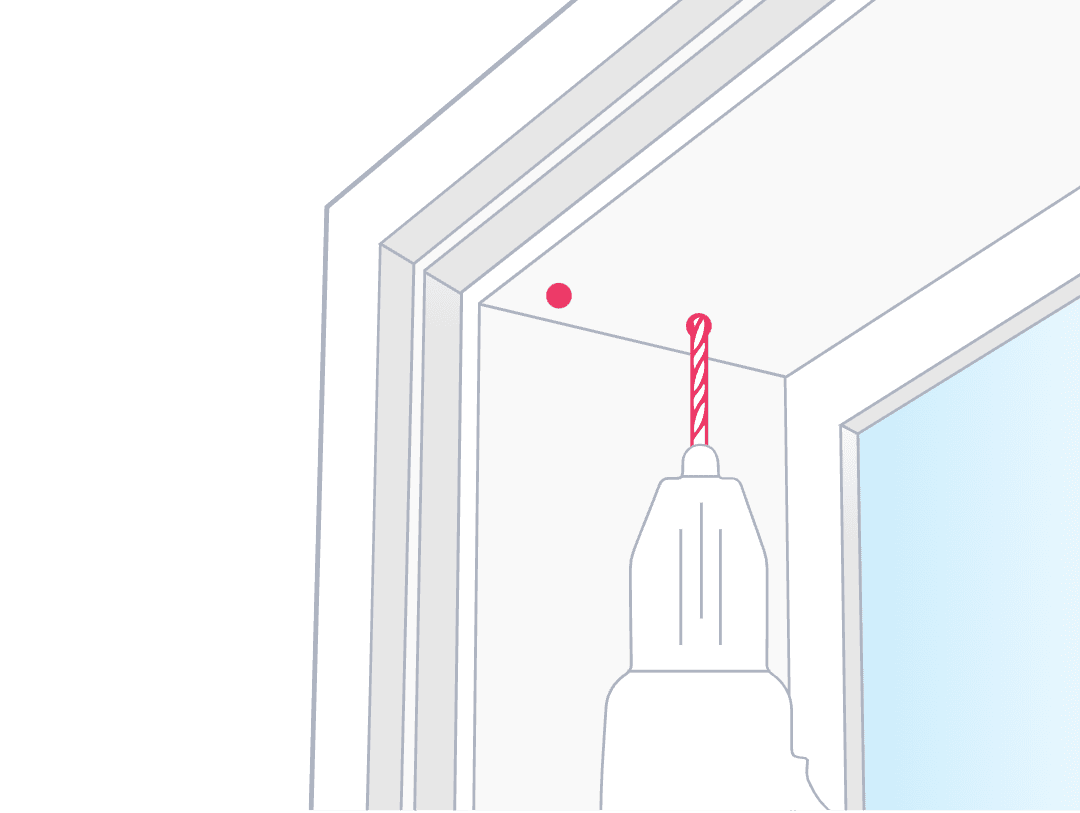
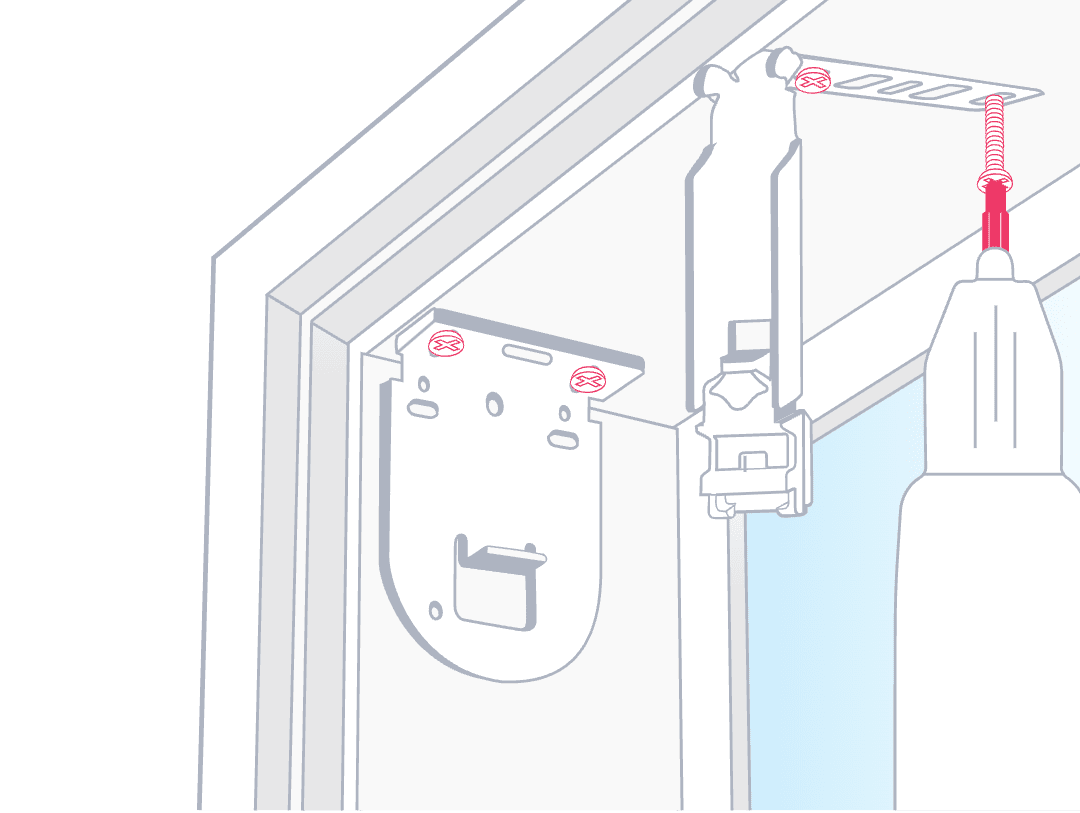
A
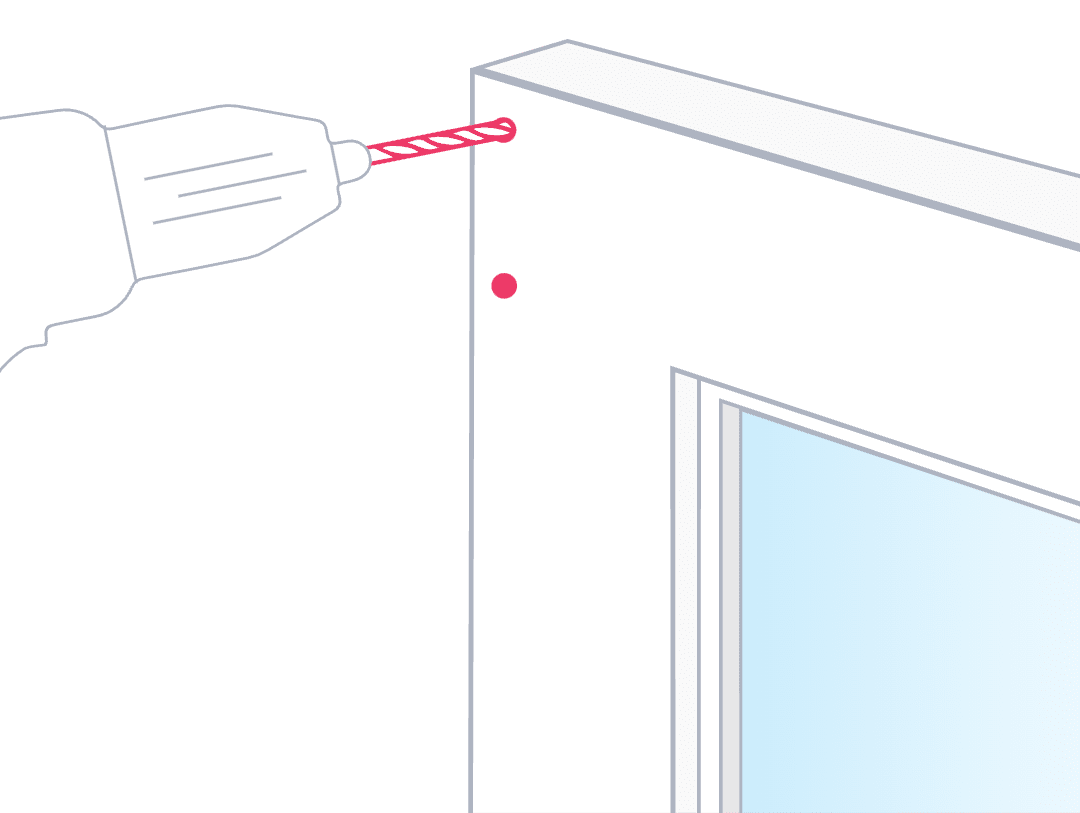
Using your cordless drill with the 3 mm drill bit, pre-drill 2 holes where you marked the two pencil dots.

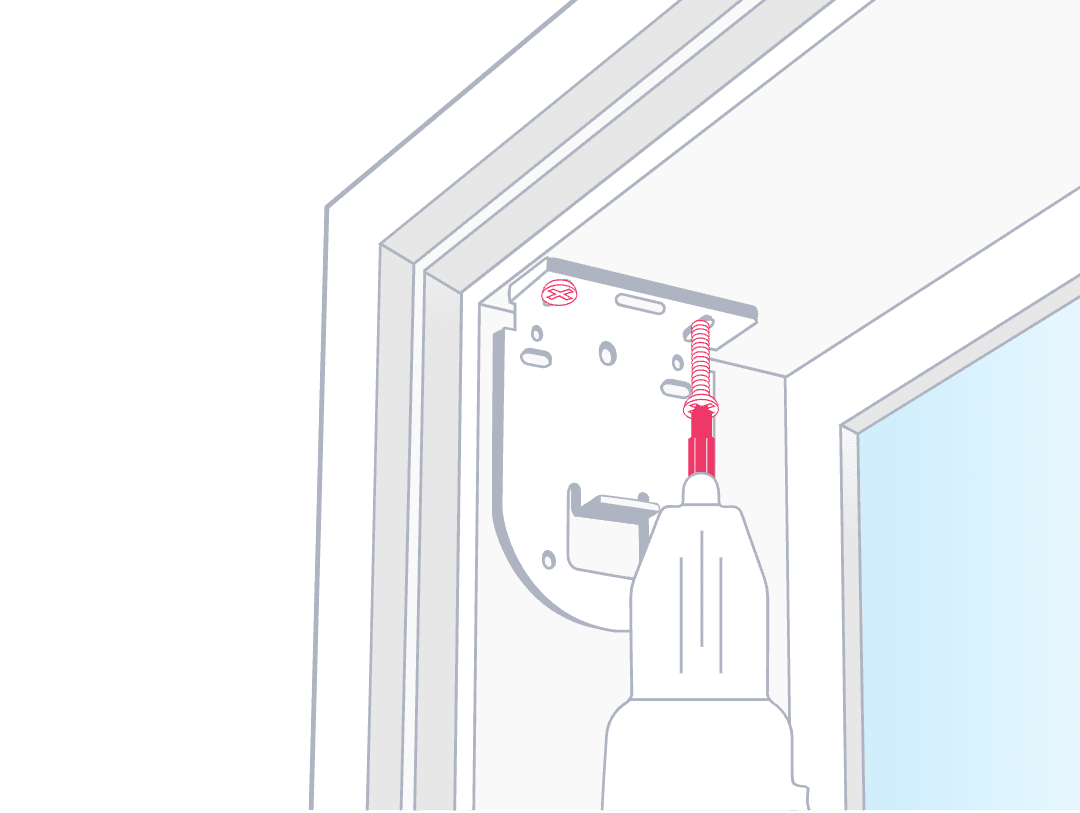
B
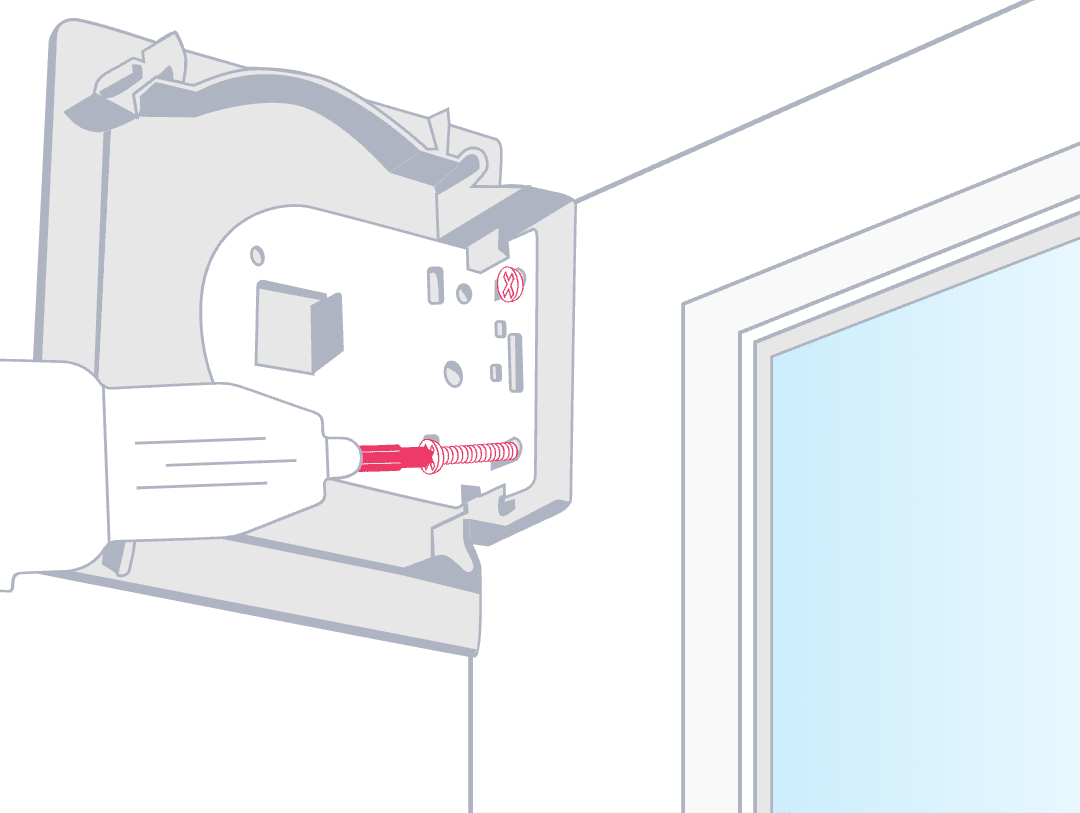
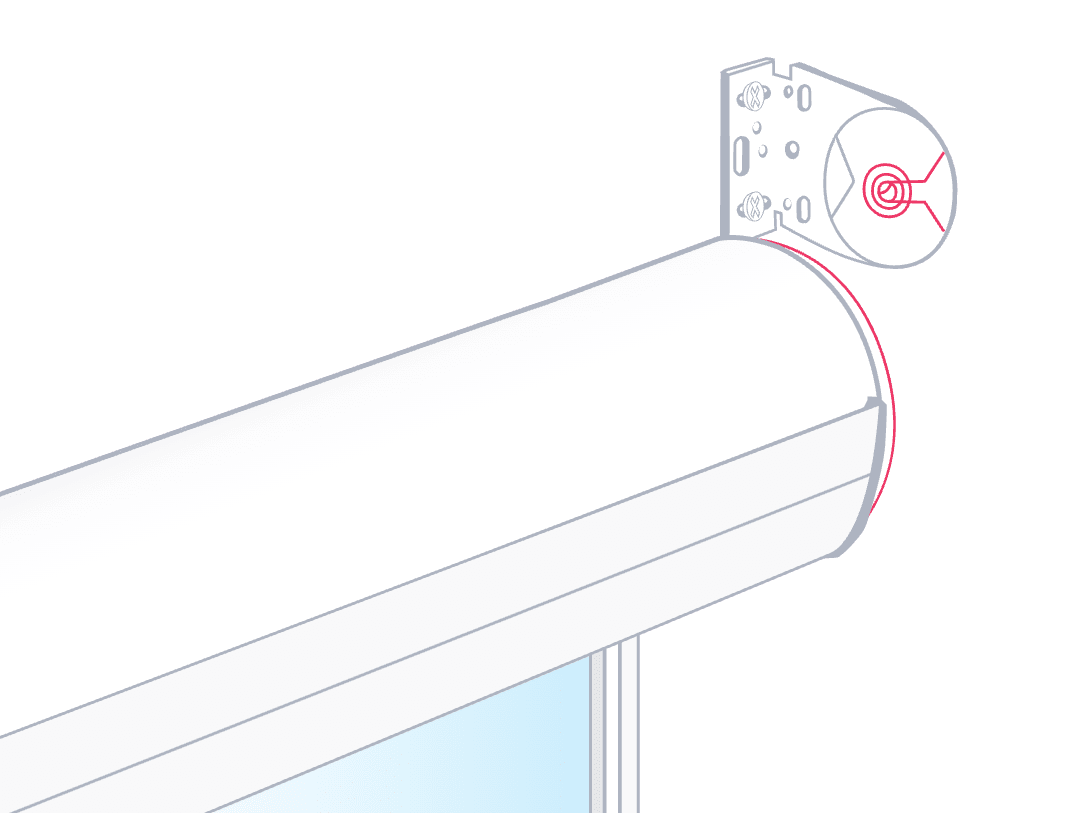
Pick up the chain drive bracket and position it on the side of the frame where your chain will sit. The holes in the bracket should be directly over the two holes you just drilled. Secure the bracket with the screws in your custom kit, using your cordless drill with the Phillips head drill bit.
Repeat the process for the pin end bracket.
C
Follow the same steps if you ordered a pelmet. Just remember you'll be attaching your bracket and pelmet return as one.
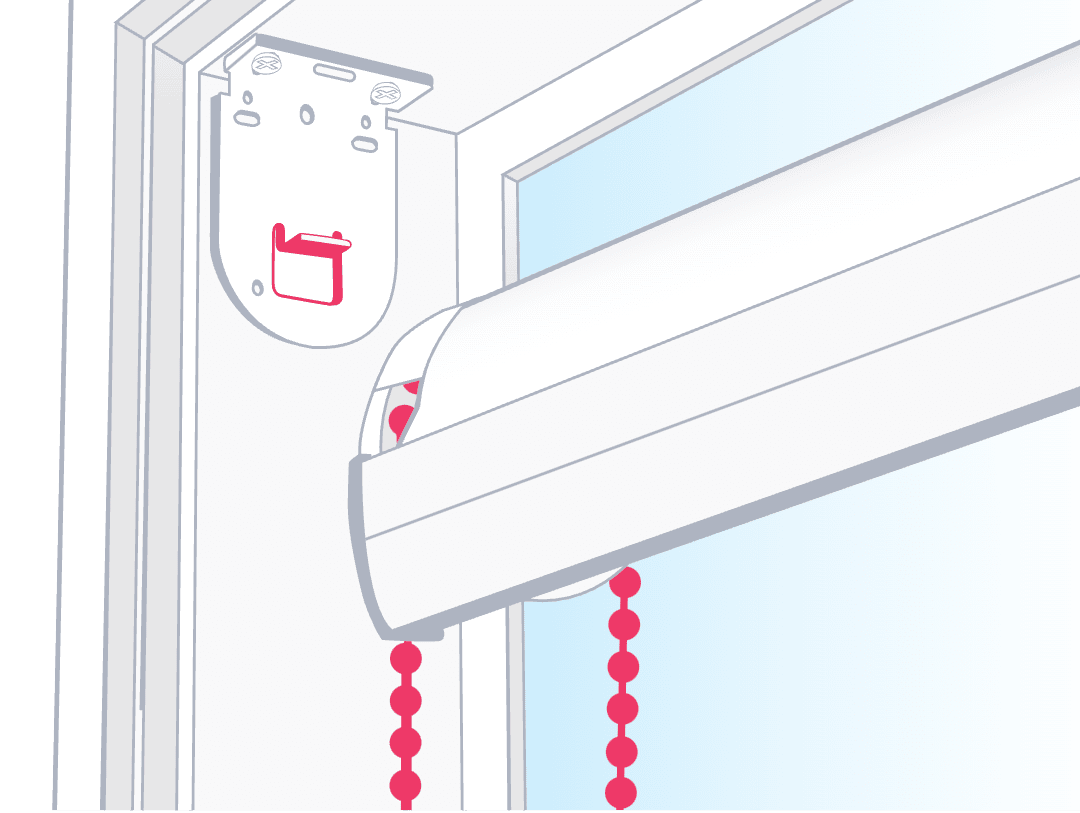
A
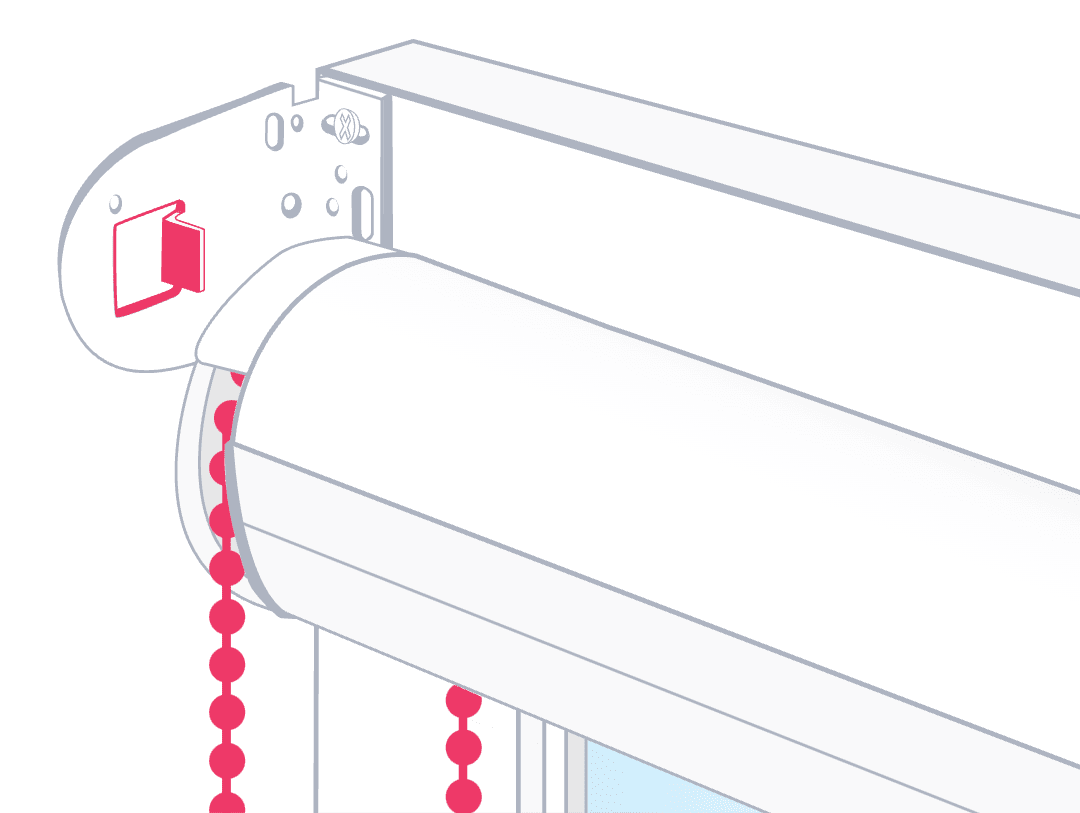
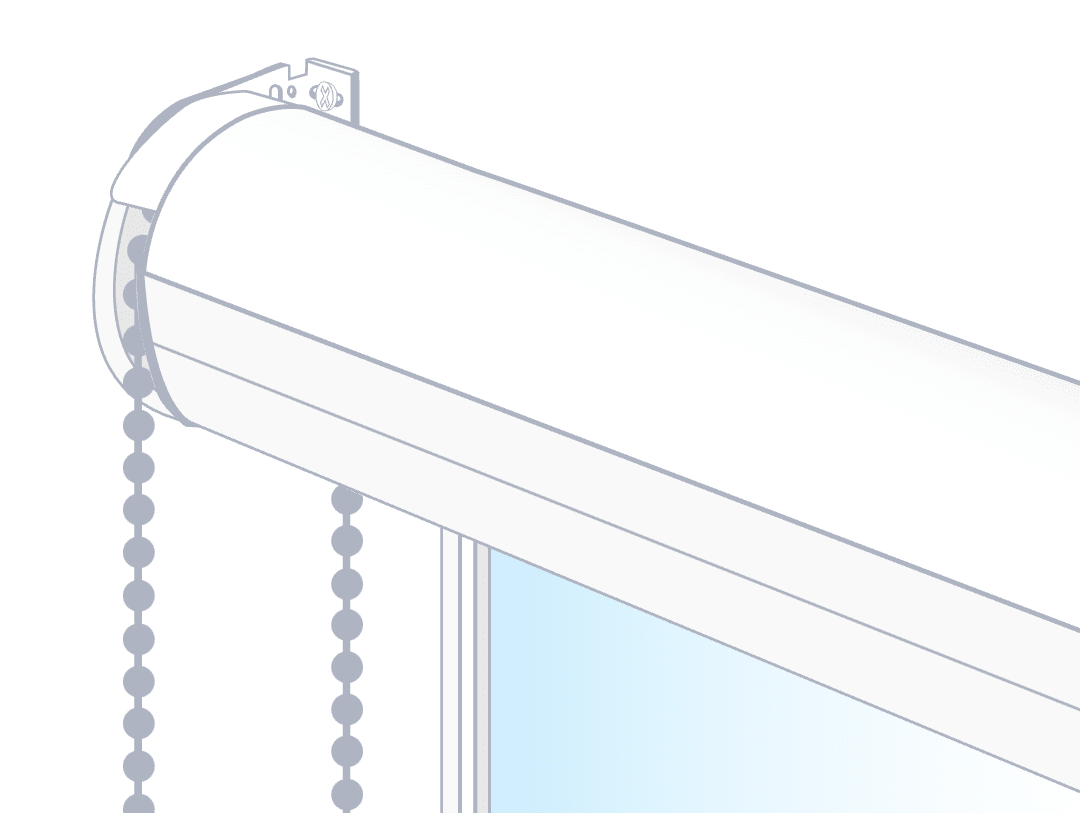
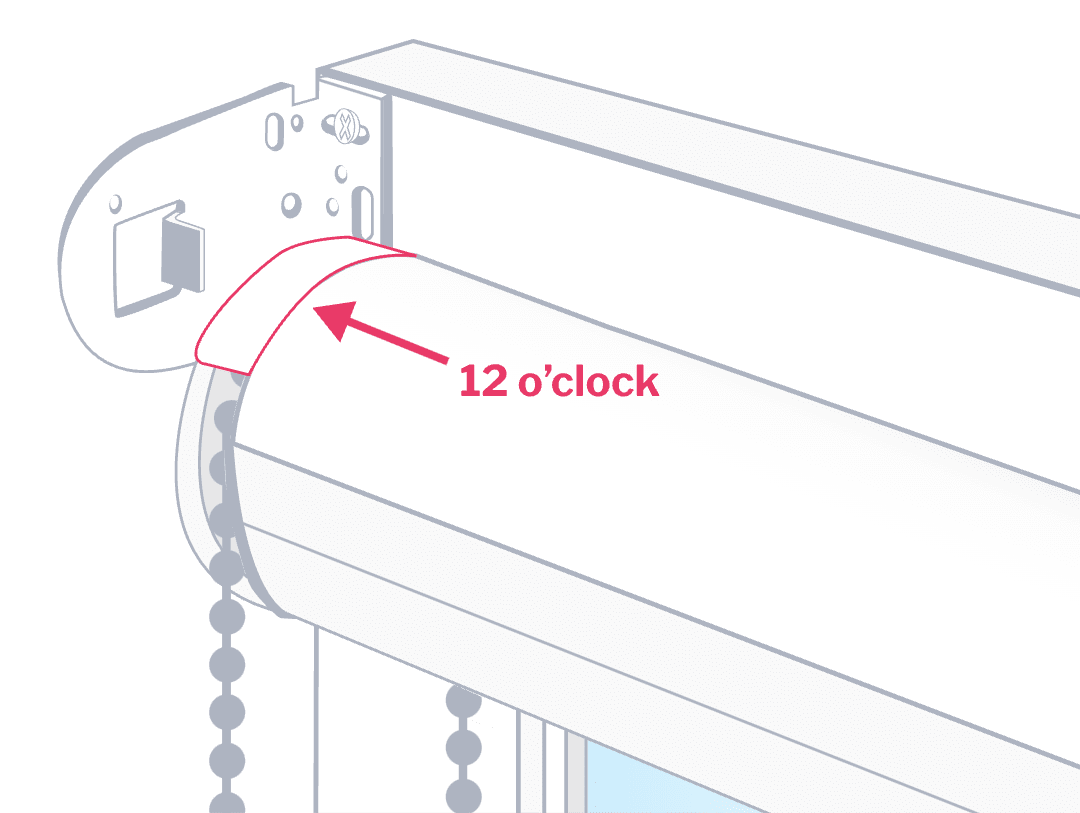
Pick up your roller blind and make sure your chain is on the same side as your chain bracket. Check that the hood over the chain is at 12 o'clock and the ACMEDA logo is at 6 o'clock.

B
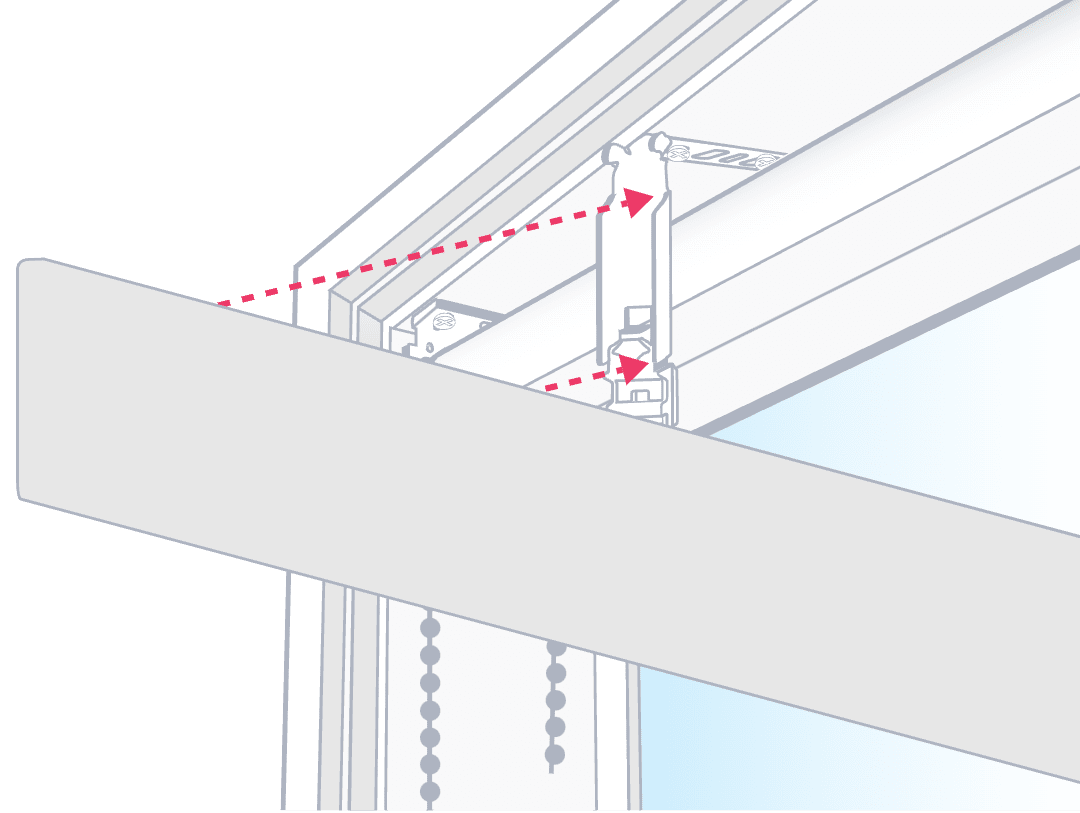
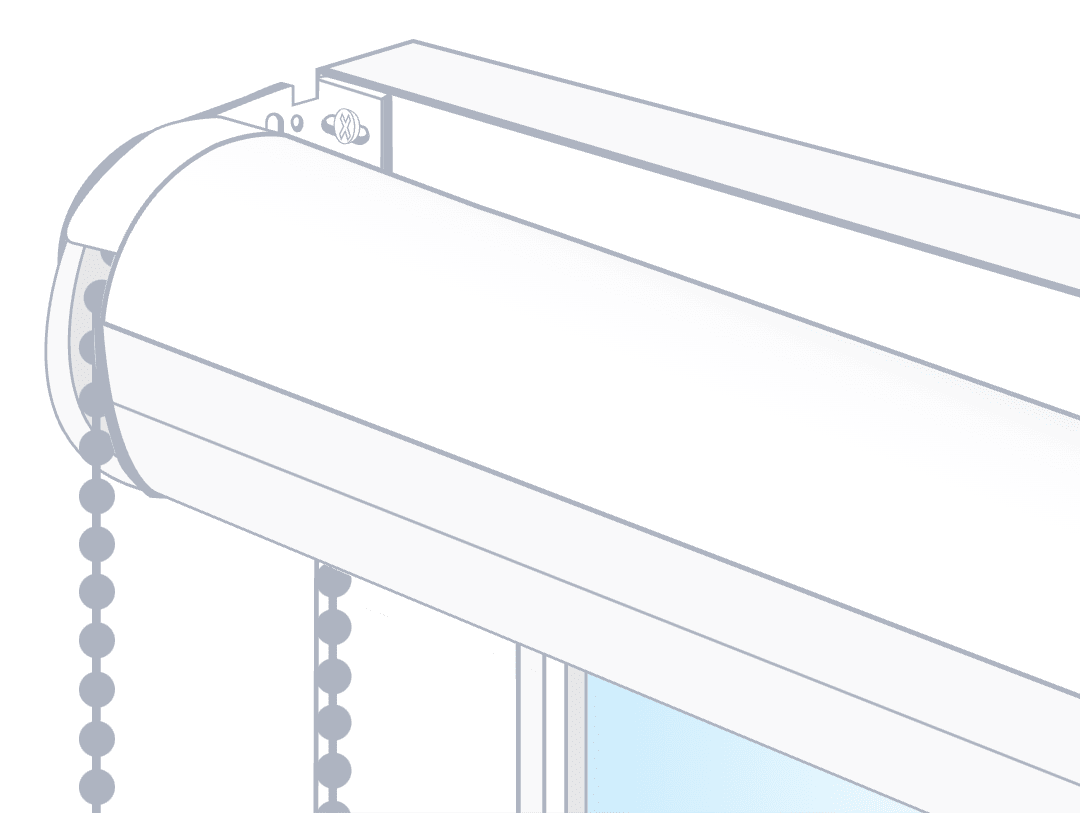
Gently slot the chain end into the chain drive bracket.
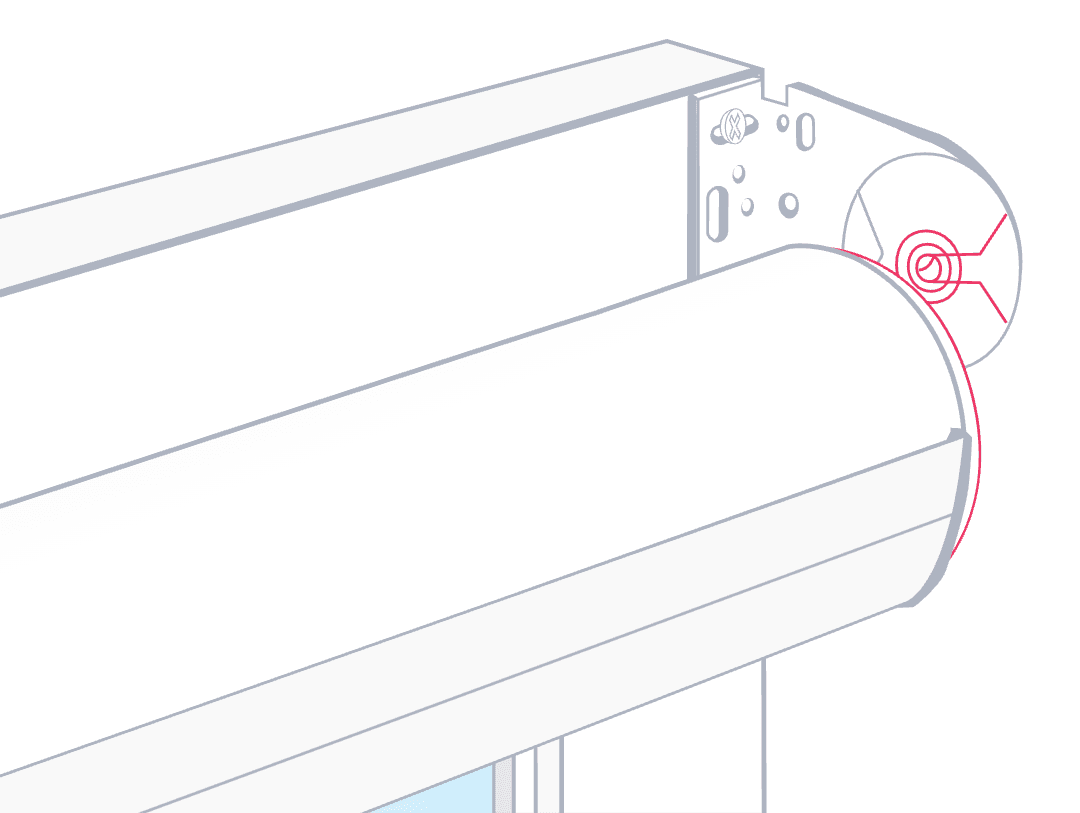
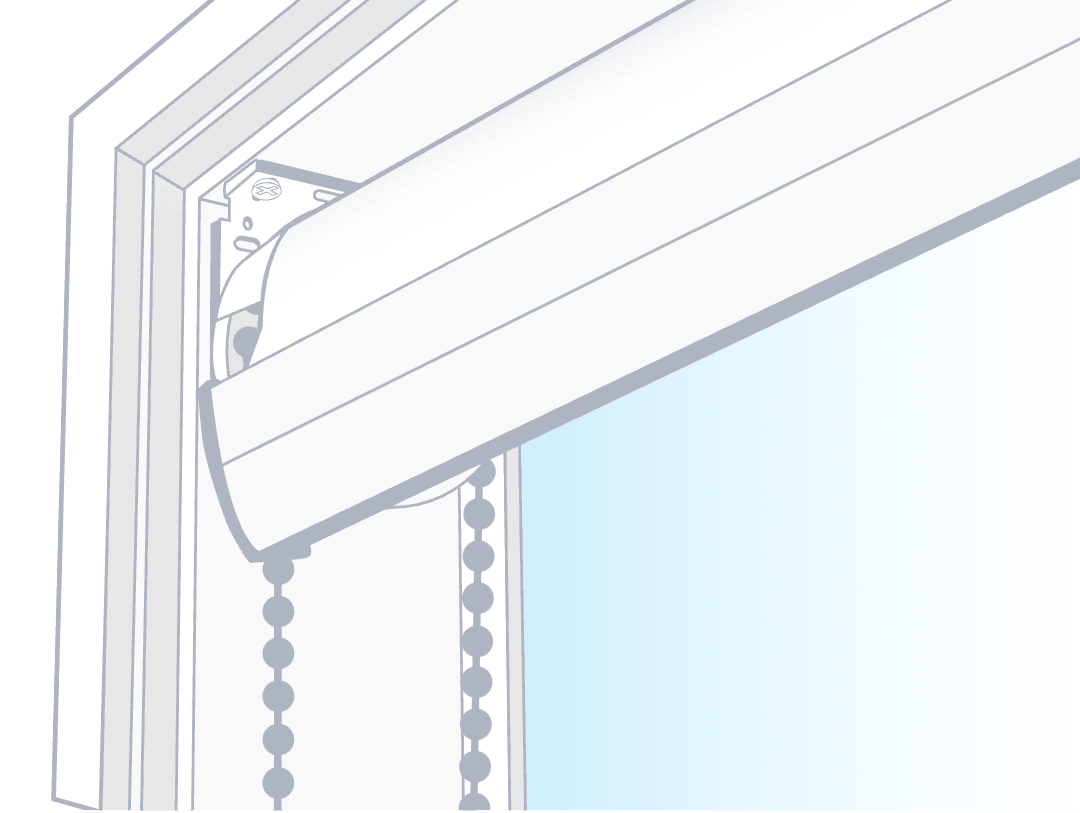
C
Then slot the pin end into the pin end bracket, until you hear a click.
Not a perfect fit? Don't stress. Your blind should click into the brackets easily. But if it doesn't, go to 'I need some extra help' at the bottom.

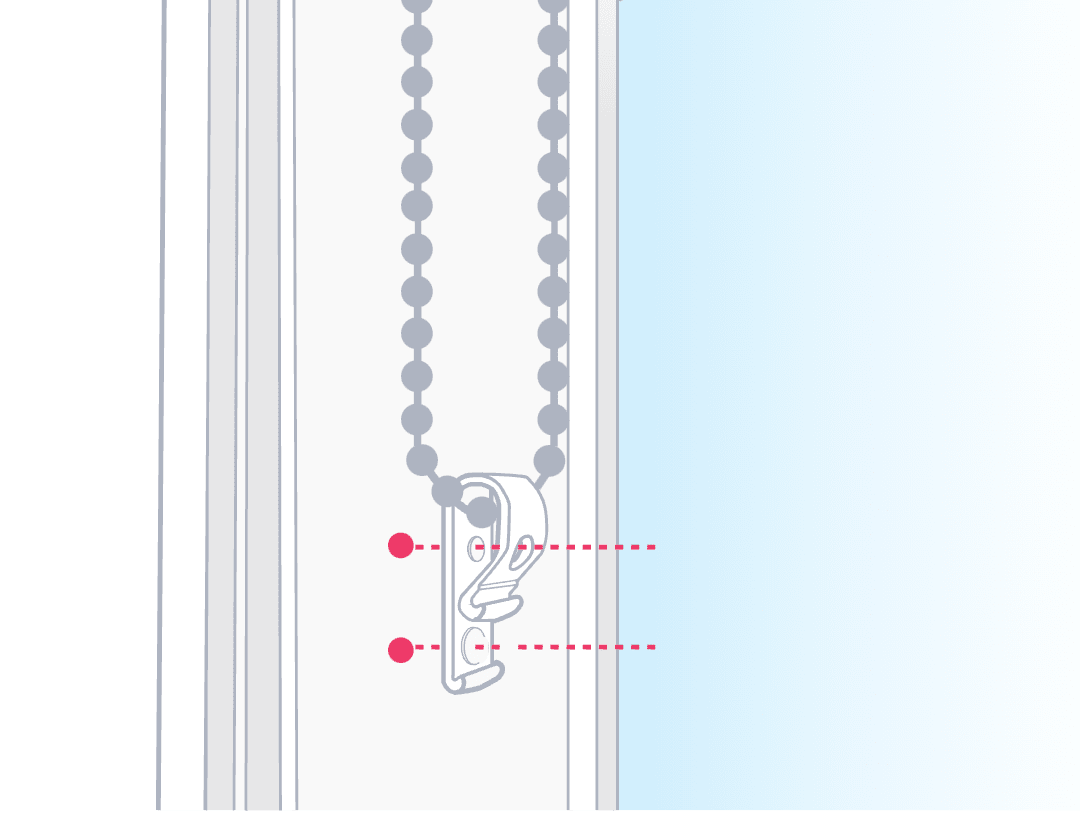
A
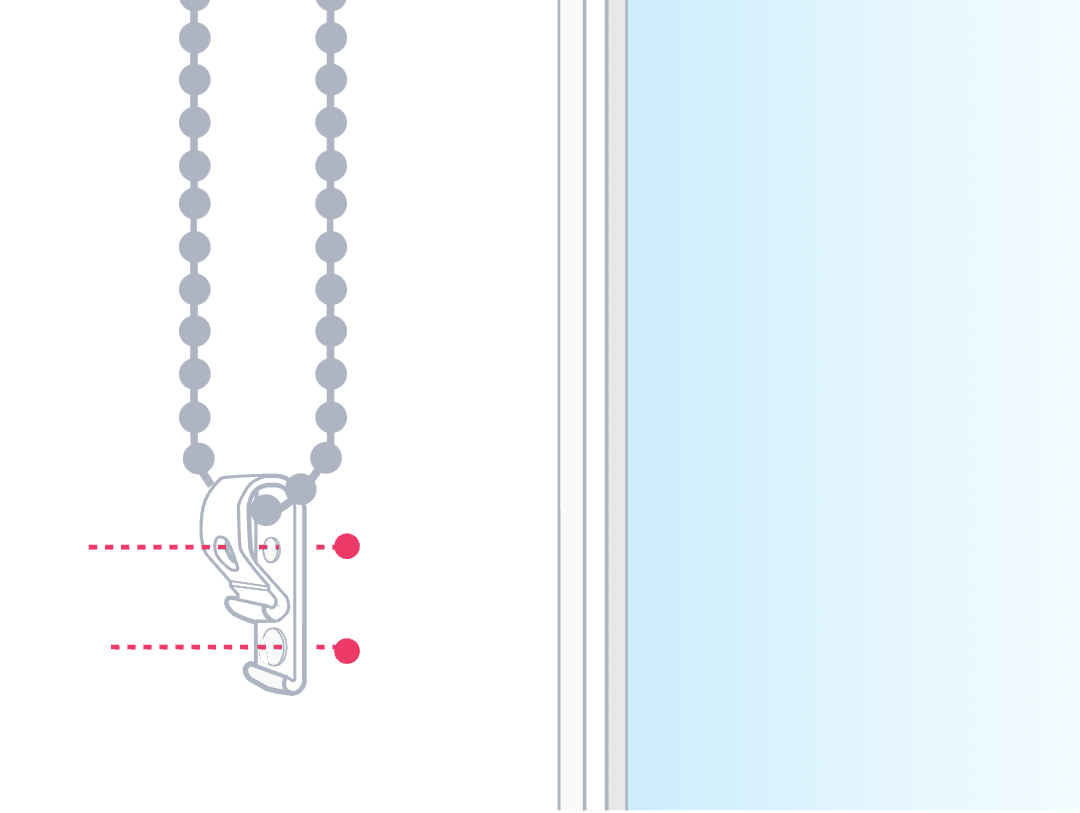
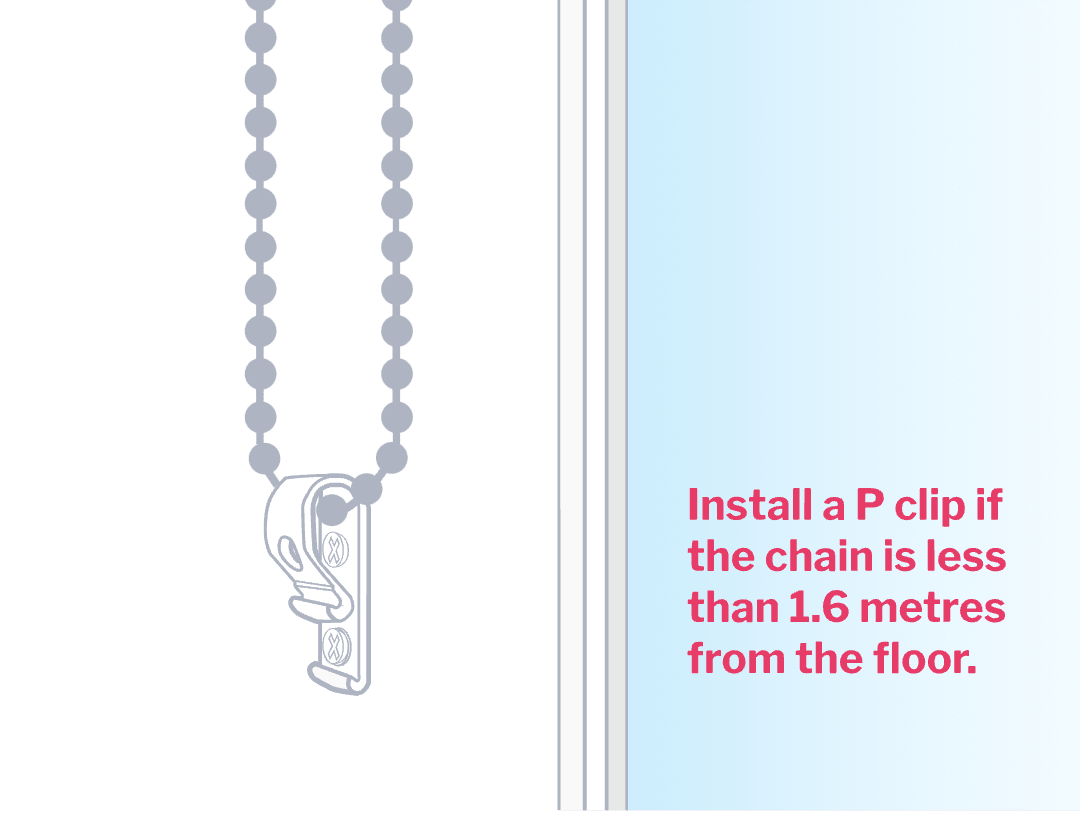
Click the P clip onto the bottom of the chain loop, then hold it into position and mark a dot where the screw will attach the P clip to the frame or wall. Remember the chain should hang down with minimal tension.
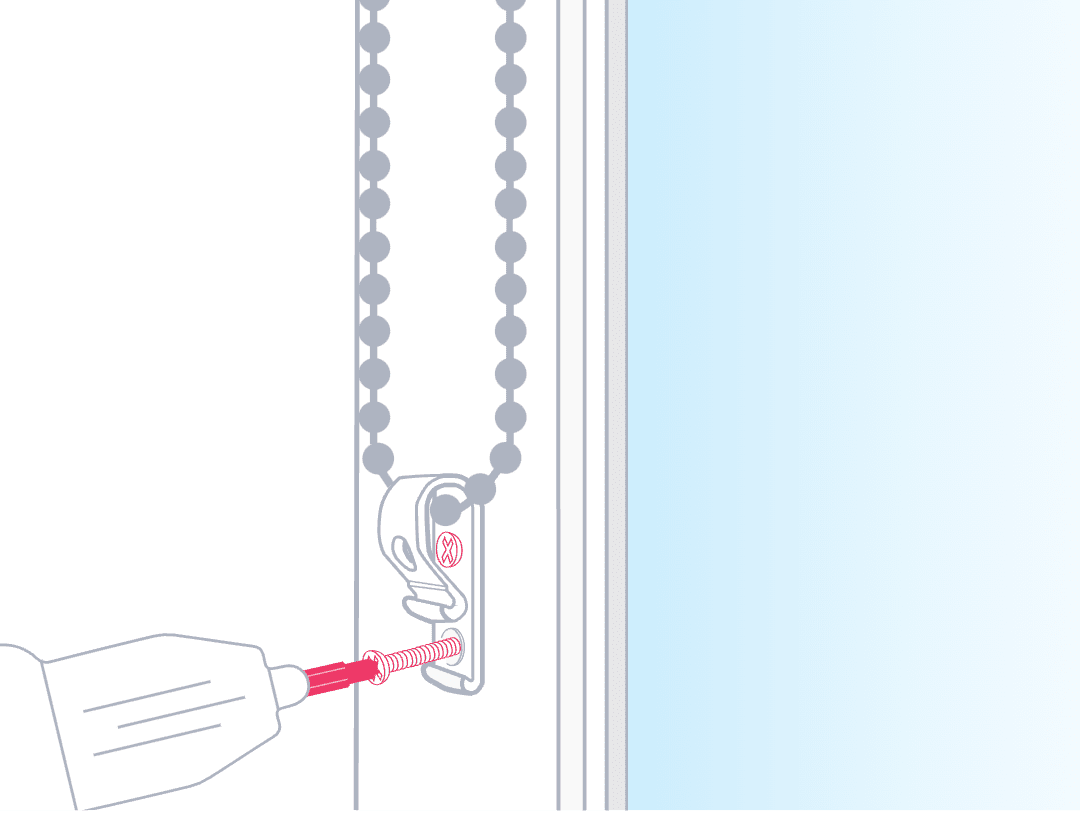
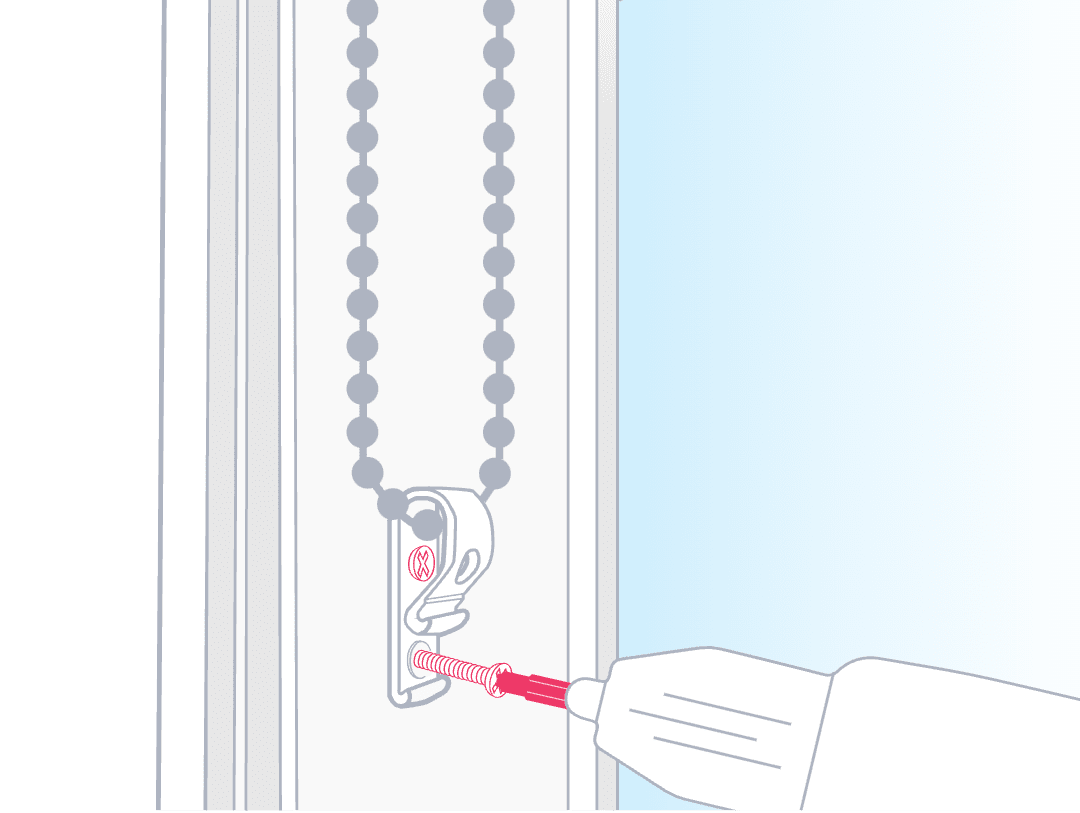
B
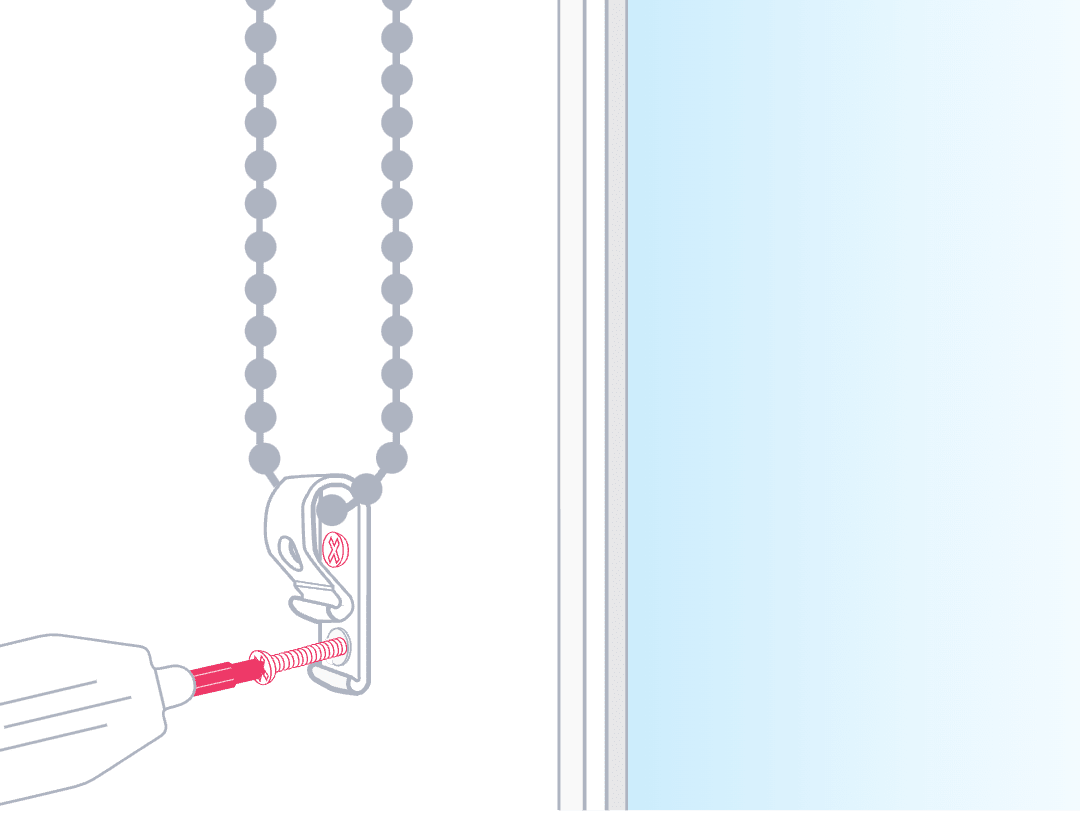
Screw the P clip onto your frame or wall, using your cordless drill with the Phillips head drill bit. Remember that attaching to a wooden frame or wall studs is best, otherwise do your homework.
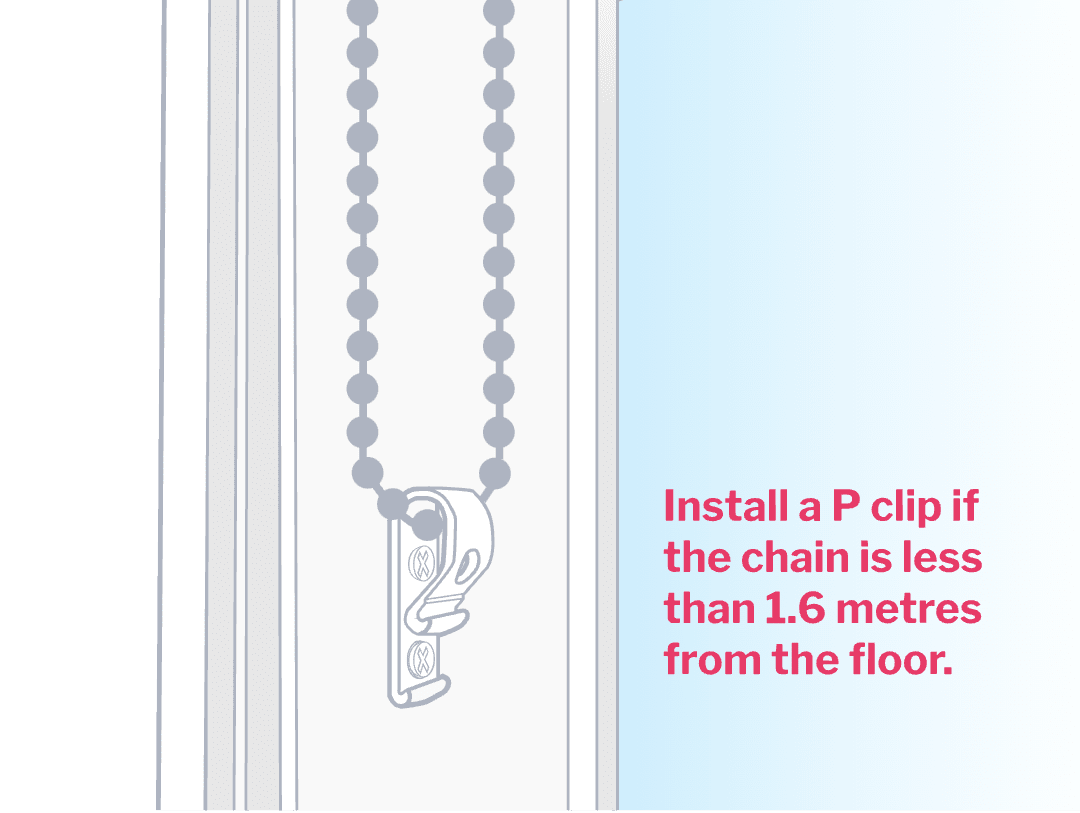
C
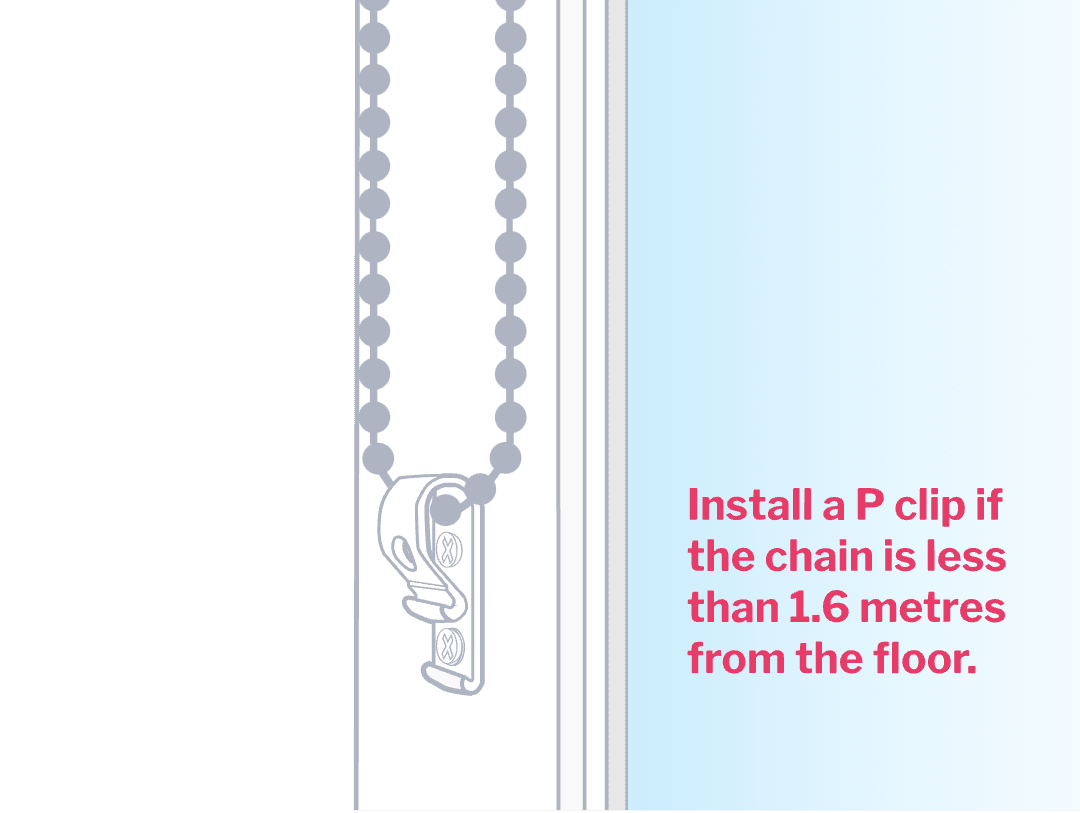
We take Australian child safety laws seriously. They state you must install a P clip if the chain is less than 1.6 metres from the floor. This is to prevent any risk of strangulation. See 'Let's get real about child safety' at the bottom for more info.
D
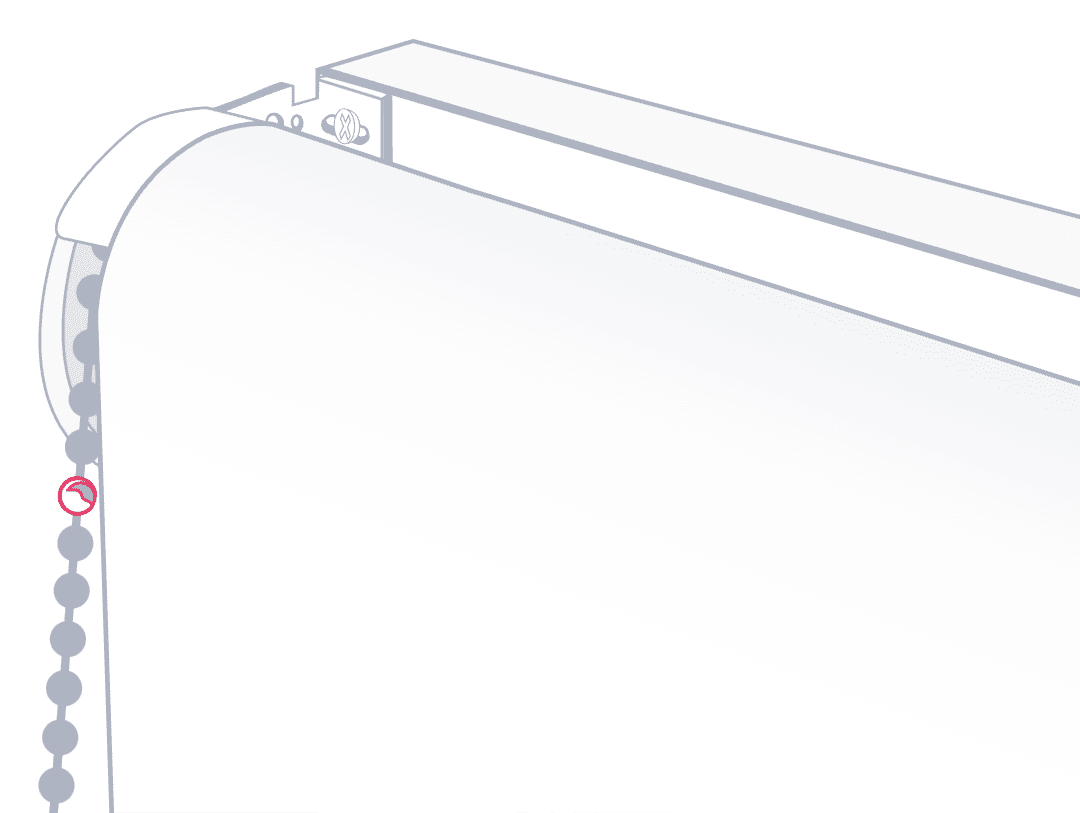
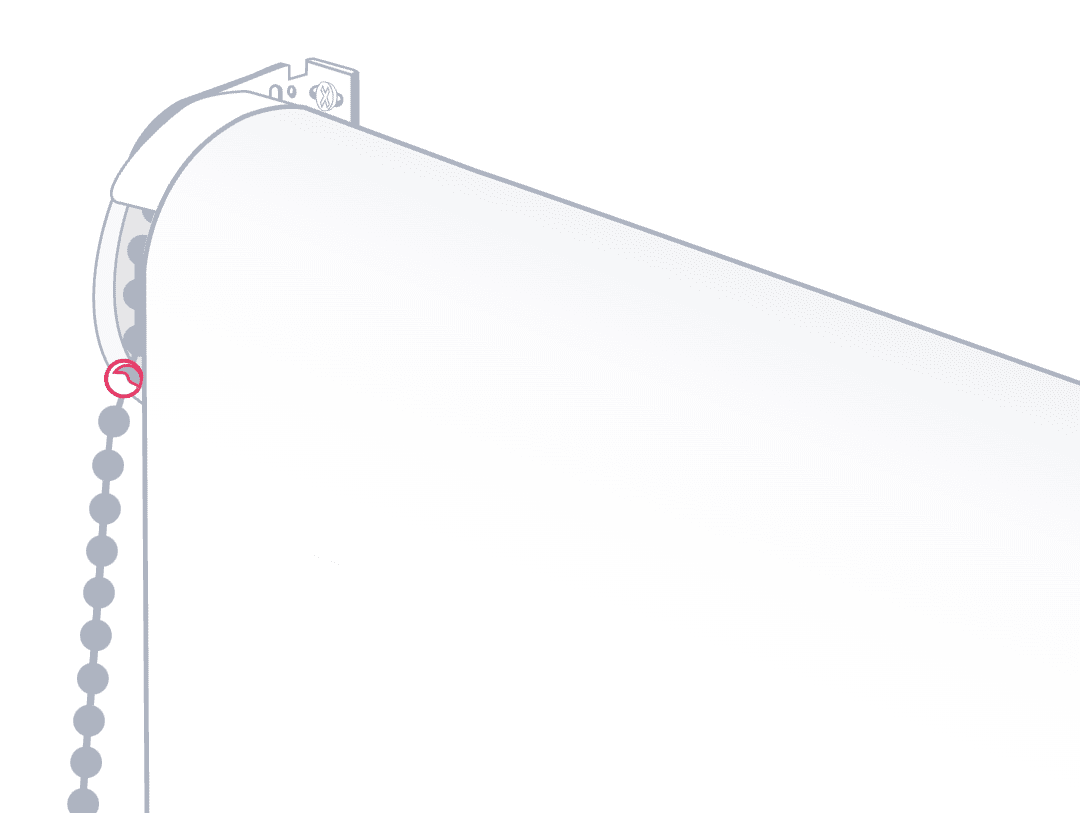
To ensure your blind operates smoothly and remains covered by warranty, it's essential to install the ball stopper. Roll it down until you’re happy with where it finishes, then grab your ball stopper and click it into the very top of the chain. This step is crucial as it helps ensure the quality of the operation of your new roller blind.
A
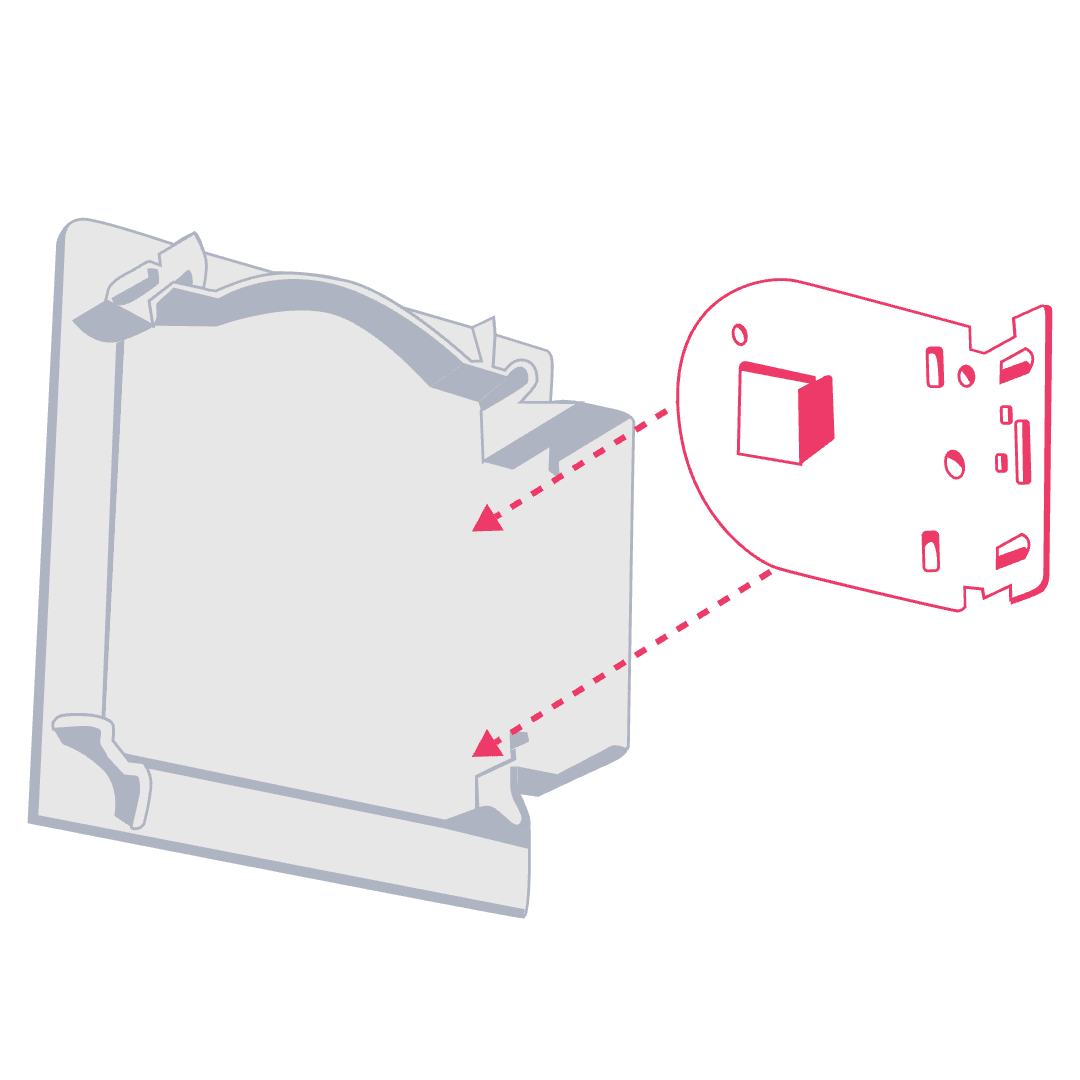
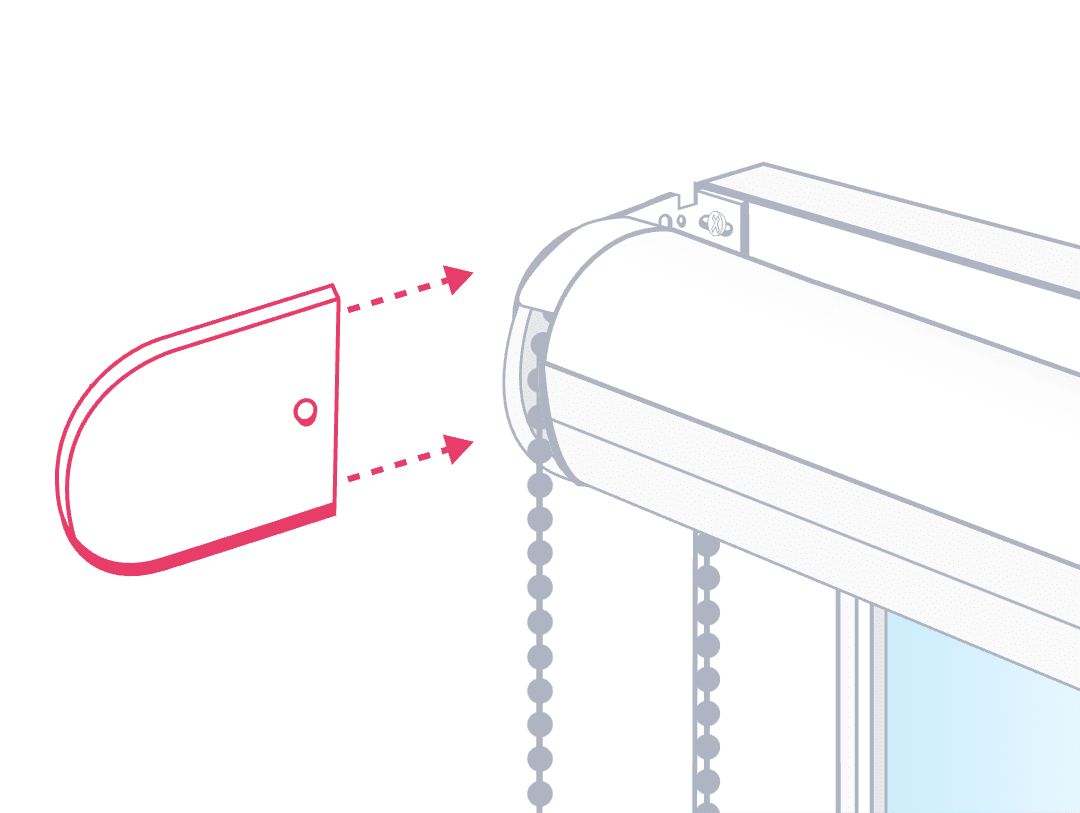
Slide your two bracket covers onto the outside of each bracket.
B
If you ordered a pelmet, attach it to one bracket then use a small amount of force to clip in the other side. Once it's up, the pelmet sits neatly in the pelmet returns and your blind rolls up and down easily.
A
Unpack your custom kit, and lay out your roller blind on a clean floor, under your window.
B
If you ordered a pelmet, now's the time to slip your brackets into the pelmet returns, as you will be mounting them as one in steps 2 and 3.
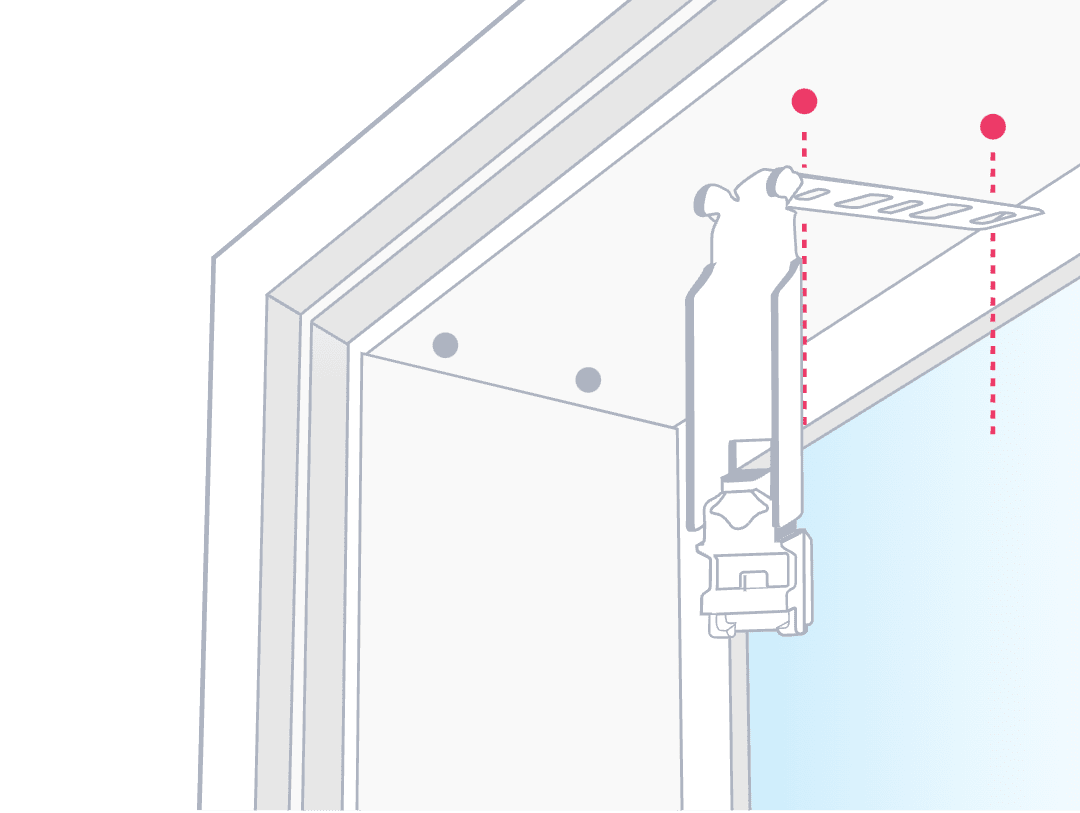
A
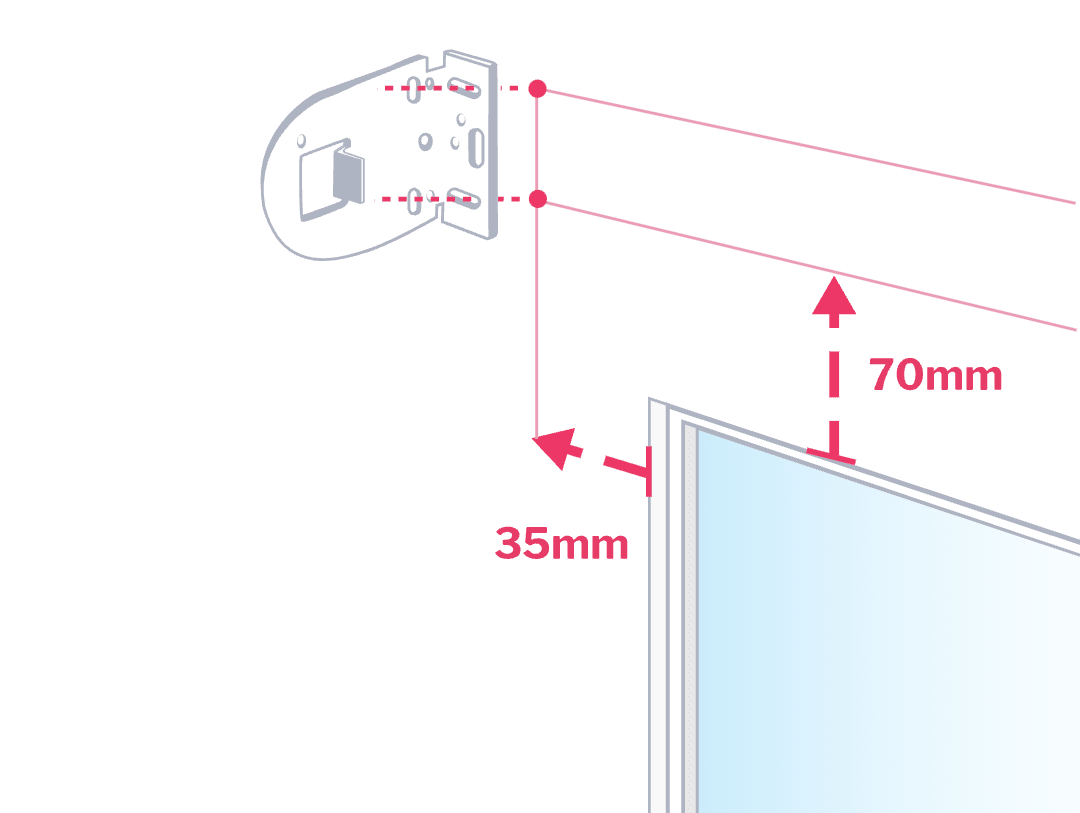
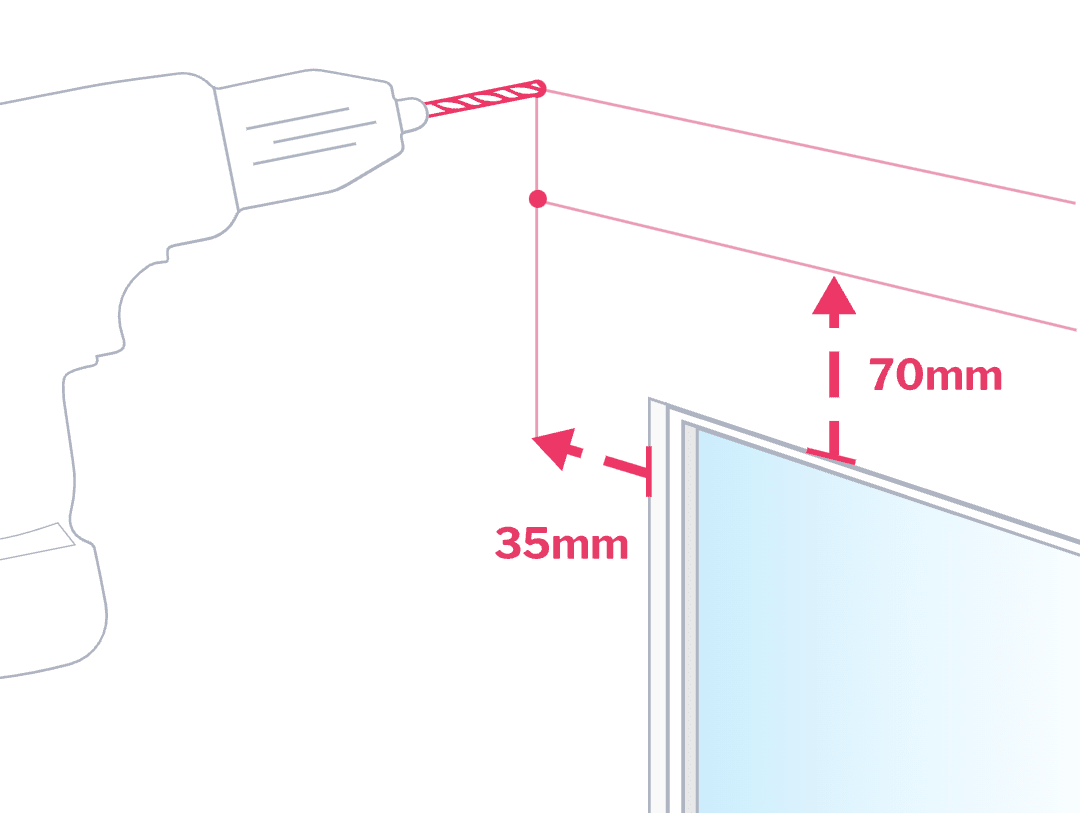
Take your pencil and both brackets. Lift each bracket up into position and mark two level dots where the screws will attach the bracket to the wall.
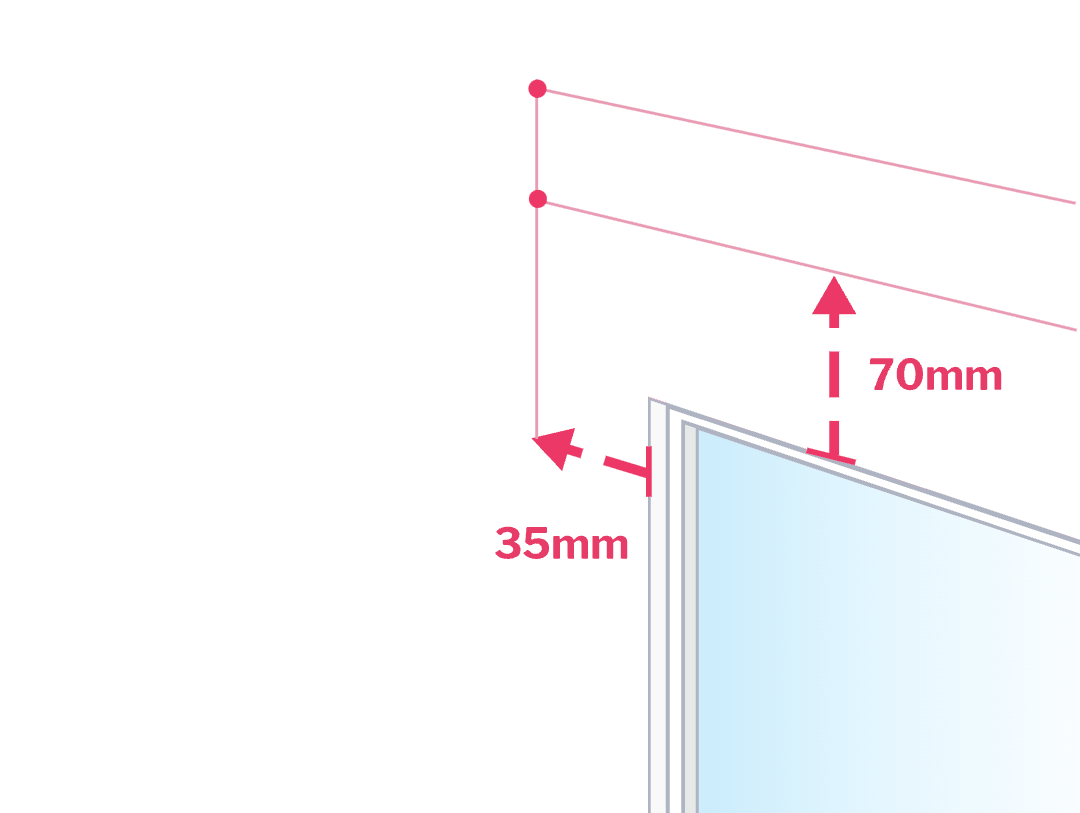
B
This will be at least 35 mm out from each side of your window and 70 mm above the top of your window. Check back to the measurements you took.
3. Attach your brackets
Using your cordless drill with the 3 mm drill bit, pre-drill 2 holes where you marked the two pencil dots.
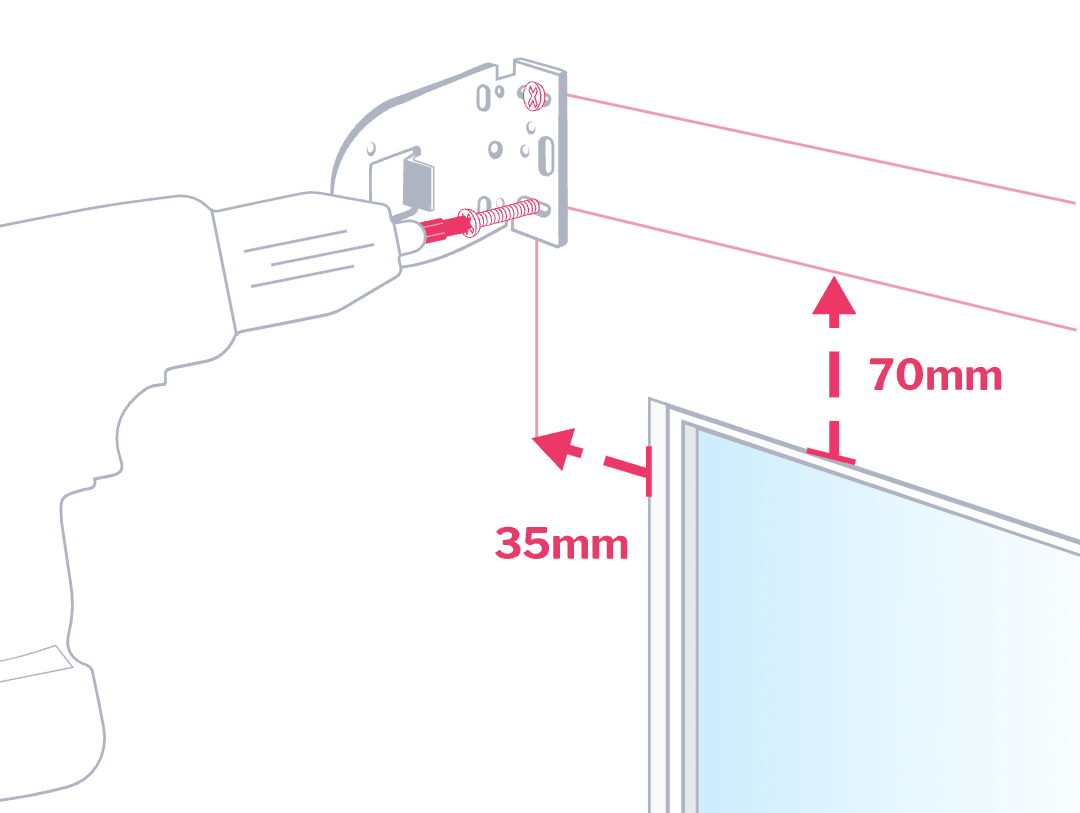
B
Pick up the chain drive bracket and position it on the side of the window where your chain will sit. The holes in the bracket should be directly over the two holes you just drilled. Secure the bracket with the screws in your custom kit, using your cordless drill with the Phillips head drill bit.
Repeat the process for the pin end bracket.
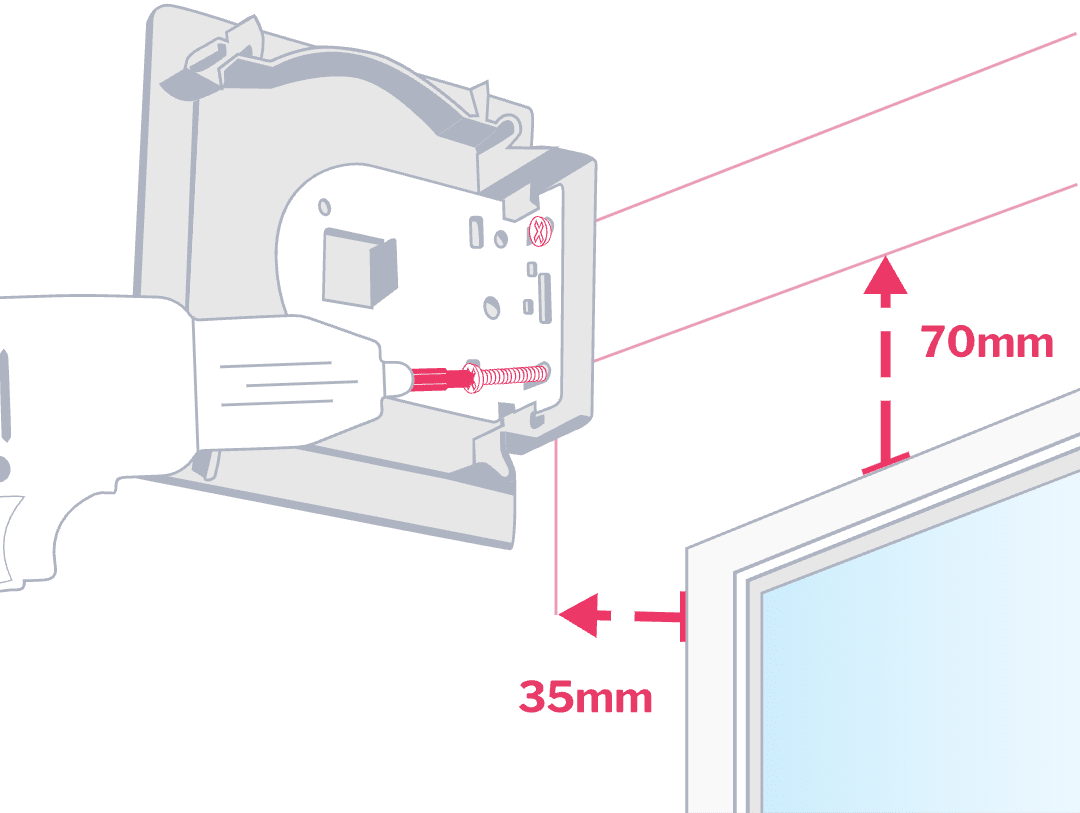
C
Follow the same steps if you ordered a pelmet. Just remember you'll be attaching your bracket and pelmet return as one.
A
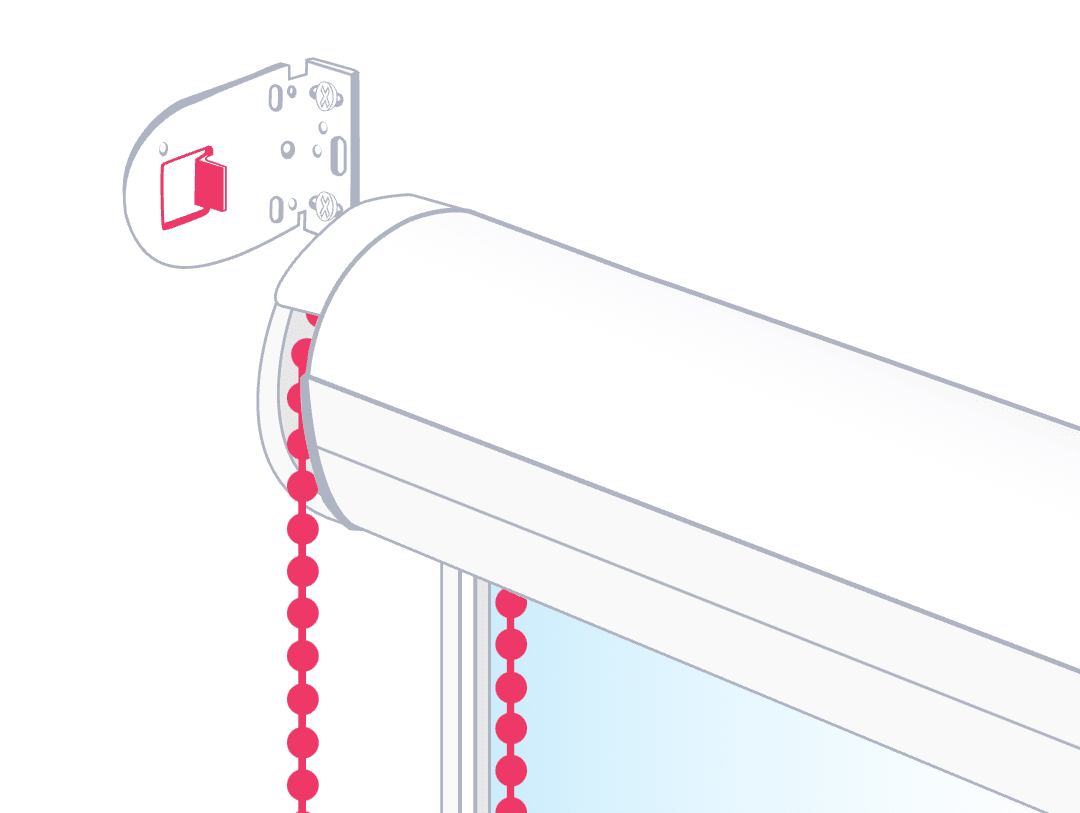
Pick up your roller blind and make sure your chain is on the same side as your chain bracket. Check that the hood over the chain is at 12 o'clock and the ACMEDA logo is at 6 o'clock.
B
Gently slot the chain end into the chain drive bracket.
C
Then slot the pin end into the pin end bracket, until you hear a click.
Not a perfect fit? Don't stress. Your blind should click into the brackets easily. But if it doesn't, go to 'I need some extra help' at the bottom.
A
Click the P clip onto the bottom of the chain loop, then hold it into position and mark a dot where the screw will attach the P clip to the frame or wall. Remember the chain should hang down with minimal tension.
B
Screw the P clip onto your frame or wall, using your cordless drill with the Phillips head drill bit. Remember that attaching to a wooden frame or wall studs is best, otherwise do your homework.
C
We take Australian child safety laws seriously. They state you must install a P clip if the chain is less than 1.6 metres from the floor. This is to prevent any risk of strangulation. See 'Let's get real about child safety' at the bottom for more info.
A
Use the ball stopper to adjust precisely where the blind rolls down to. Roll it down until you’re happy with where it finishes, then grab your ball stopper and click it into the very top of the chain. This will help maximise the life of your blinds by taking some pressure off the fabric.

B
If you ordered a pelmet, attach it to one bracket then use a small amount of force to clip in the other side. Once it's up, the pelmet sits neatly in the pelmet returns and your blind rolls up and down easily.
Get organised
Unpack your custom kit, and lay out your roller blind on a clean floor, under your window.
A
Take your pencil and both brackets. Lift each bracket up into position and mark two level dots where the screws will attach the bracket to the frame.
B
This will be in the top corners, inside your frame. Allow 10 mm of clearance out from the glass in your windows. Also remember to allow for minor obstructions.
C
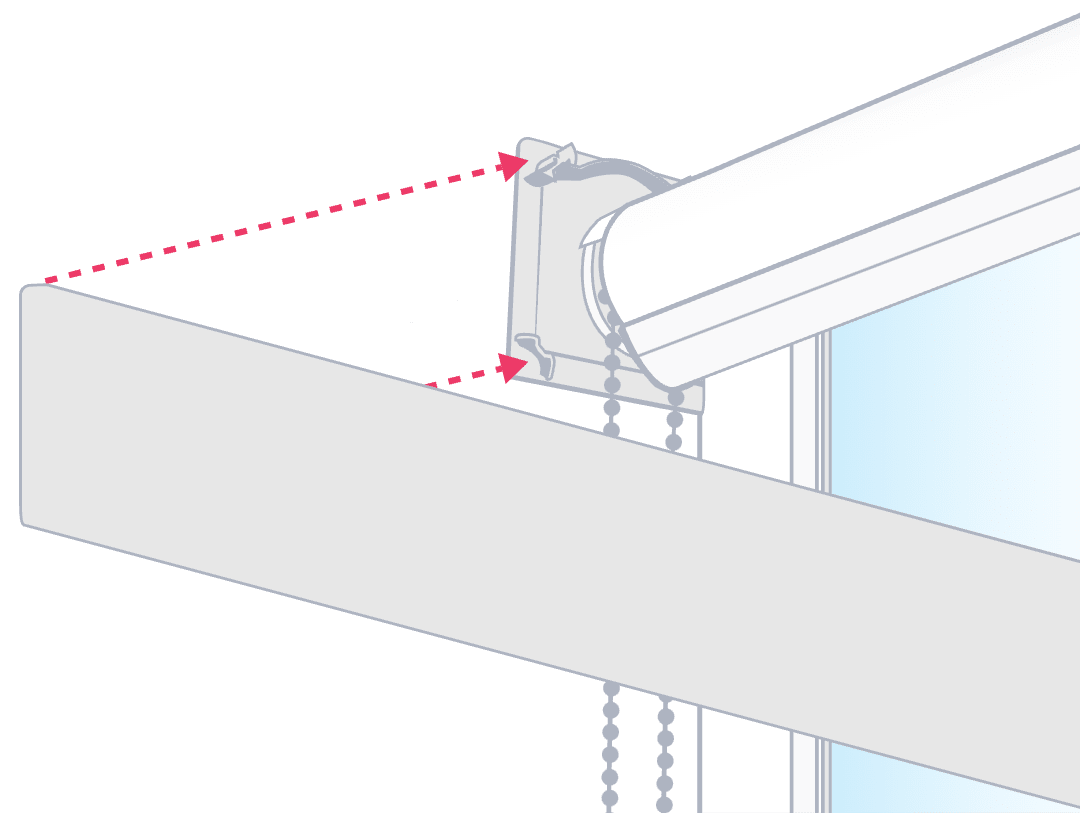
If you have a pelmet, take your two pelmet sprung brackets. Place each bracket on the underside of your frame at the top, a little way out from each blind bracket. Line up the face of the bracket with the front edge of your frame. Mark two dots where the screws will attach the bracket to the frame.
A
Using your cordless drill with the 3 mm drill bit, pre-drill 2 holes where you marked the two pencil dots.
B
Pick up the chain drive bracket and position it on the side of the frame where your chain will sit. The holes in the bracket should be directly over the two holes you just drilled. Secure the bracket with the screws in your custom kit, using your cordless drill with the Phillips head drill bit.
Repeat the process for the pin end bracket.
C
If you have a pelmet, pre-drill 2 holes for each pelmet sprung bracket, where you marked the pencil dots. Secure your pelmet sprung brackets with the screws in your custom kit, using your cordless drill with the Phillips head drill bit.
4. Click in your blind
Pick up your roller blind and make sure your chain is on the same side as your chain bracket. Check that the hood over the chain is at 12 o'clock and the ACMEDA logo is at 6 o'clock.
B
Gently slot the chain end into the chain drive bracket.
C
Then slot the pin end into the pin end bracket, until you hear a click.
Not a perfect fit? Don't stress. Your blind should click into the brackets easily. But if it doesn't, go to 'I need some extra help' at the bottom.
A
Click the P clip onto the bottom of the chain loop, then hold it into position and mark a dot where the screw will attach the P clip to the frame. Remember the chain should hang down with minimal tension.
B
Screw the P clip onto your frame, using your cordless drill with the Phillips head drill bit. Remember that attaching to a wooden frame or wall studs is best, otherwise do your homework.
C
We take Australian child safety laws seriously. They state you must install a P clip if the chain is less than 1.6 metres from the floor. This is to prevent any risk of strangulation. See 'Let's get real about child safety' at the bottom for more info.
A
Use the ball stopper to adjust precisely where the blind rolls down to. Roll it down until you’re happy with where it finishes, then grab your ball stopper and click it into the very top of the chain. This will help maximise the life of your blinds by taking some pressure off the fabric.
B
If you ordered a pelmet, attach it to one bracket then use a small amount of force to clip in the other side. Once it's up, the pelmet sits neatly in the pelmet returns and your blind rolls up and down easily.
Let's get real about child safety.
Children don't understand that a chain wrapped around their neck can tighten and strangle them in just a few minutes if they sit down, roll around or climb down to the floor. Children have died when the loop went over their head or they got tangled in a loose chain while:
sleeping in a cot or bed near to where chains are hanging
playing near chains, or
standing on a chair, sofa or bed to look out of a window.
You must follow the Australian Government requirements when installing your blind.
Install your p clip exactly as per step 5 of this guide
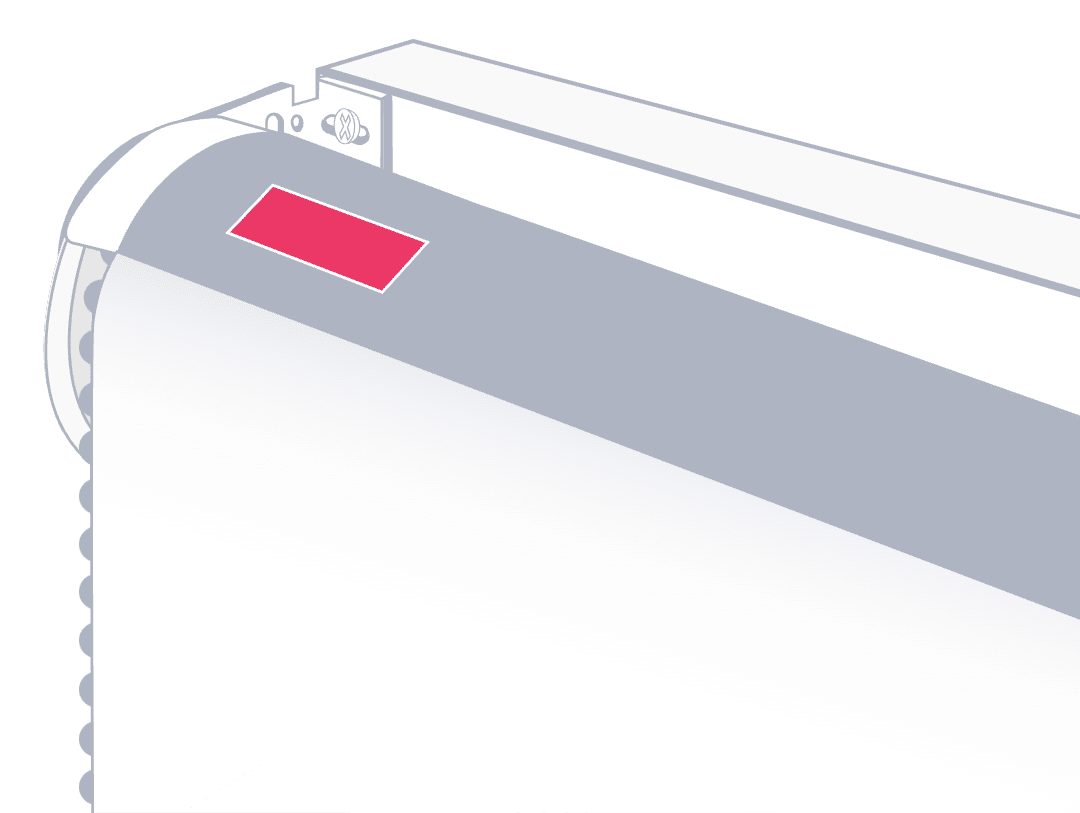
Don't remove the warning label that comes attached to your blind
Attach your own label with your name and contact details (or the details of whoever is installing your blind for you)
I need some extra help
How to fix a blind chain ? We've got an easy fix for that.

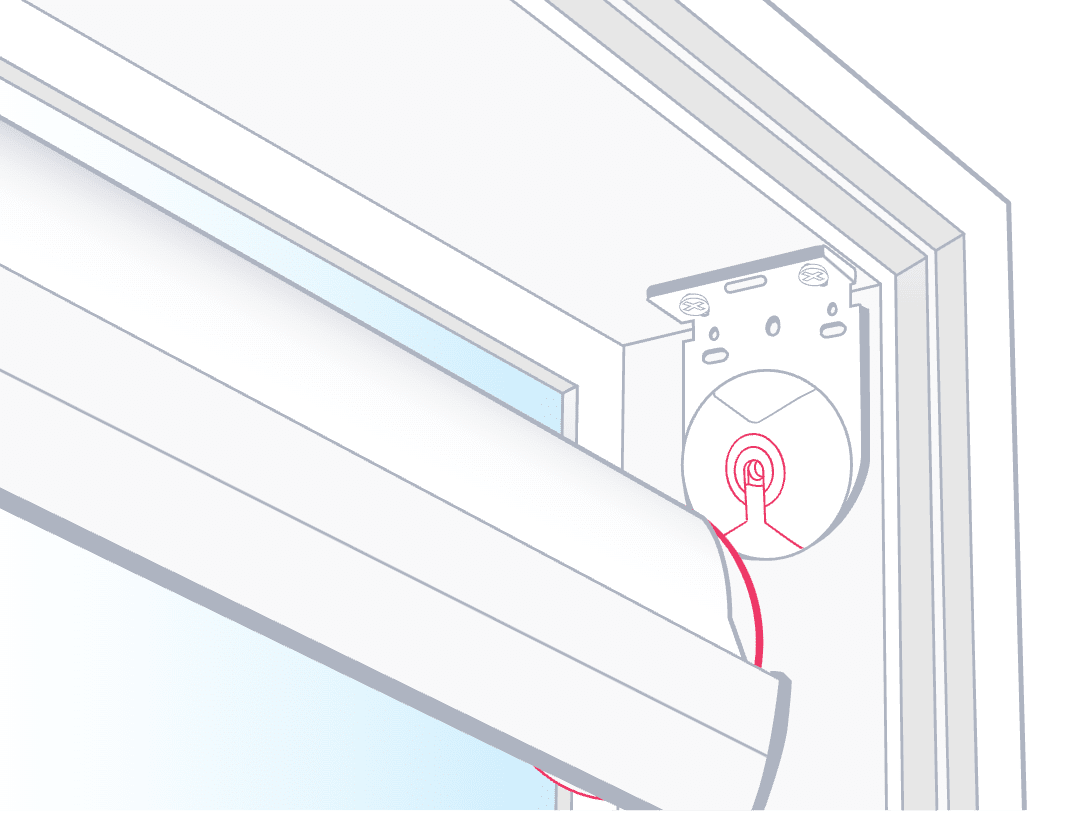
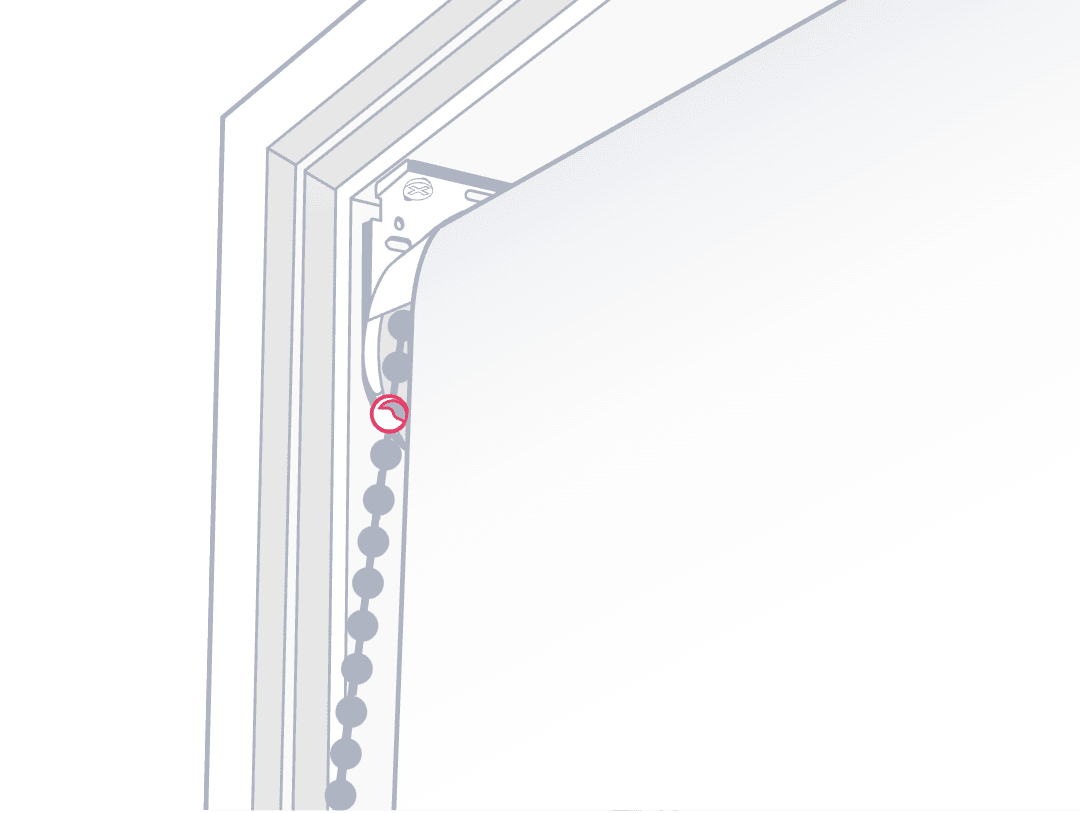
A
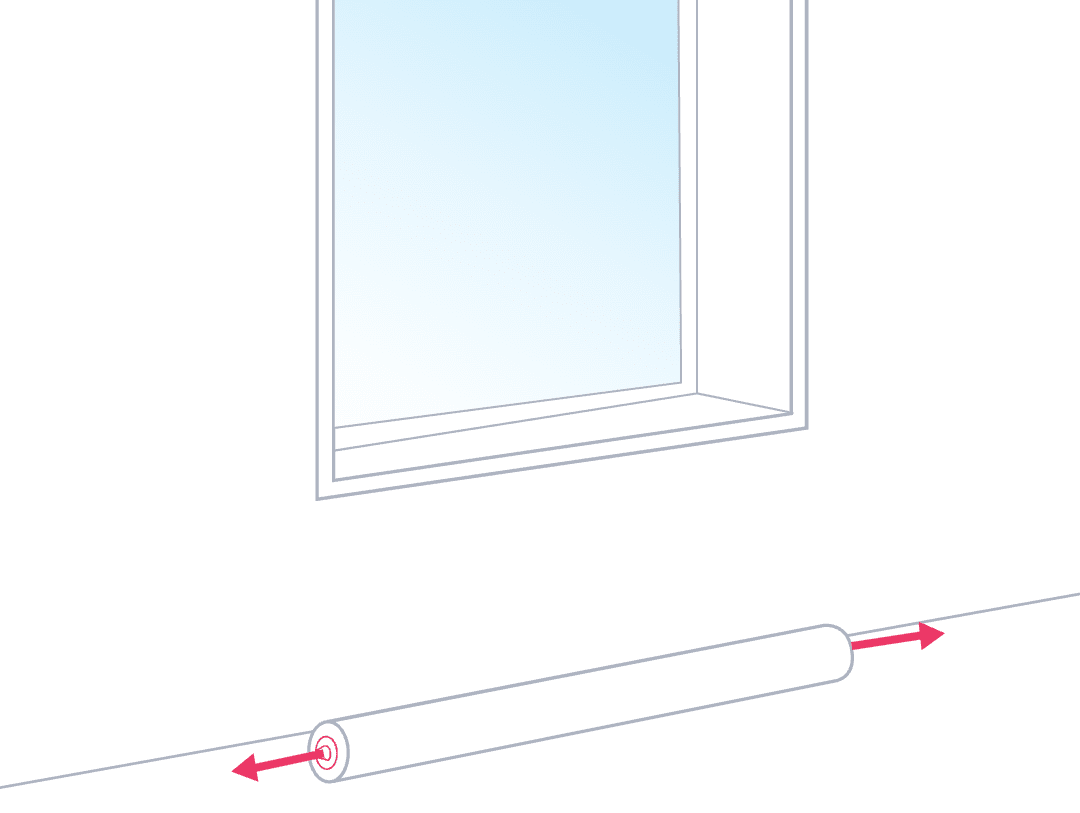
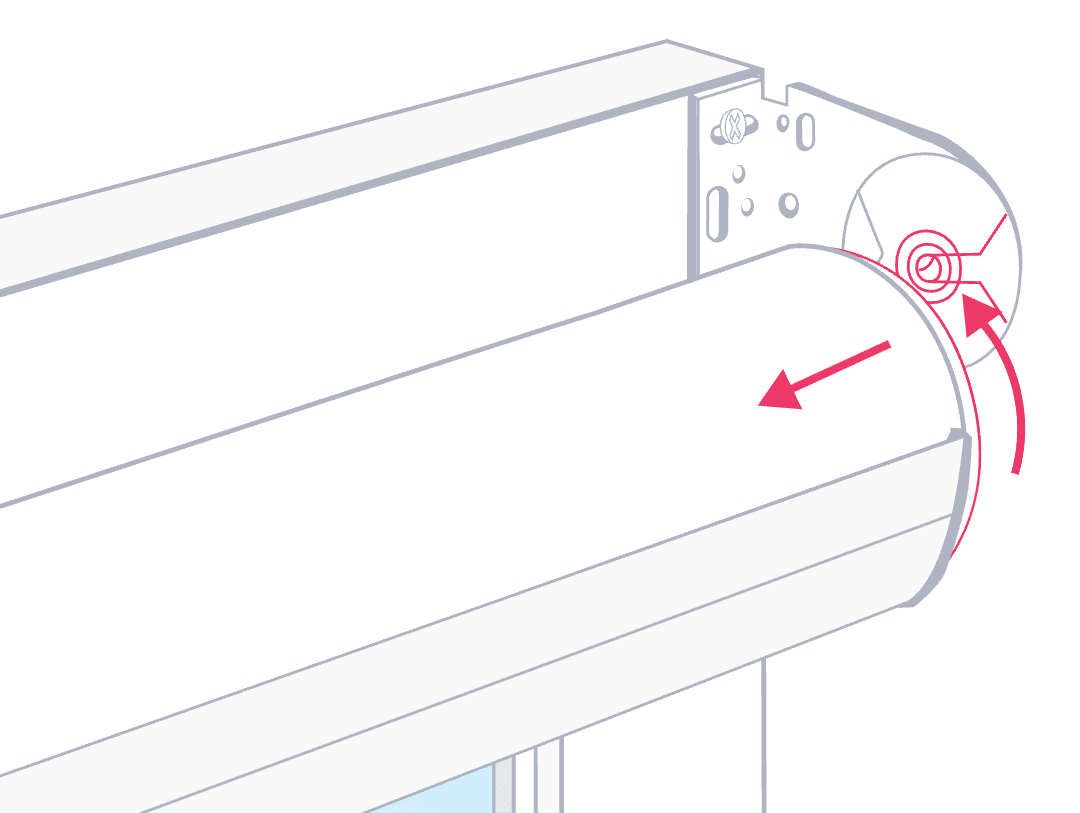
Remove your roller blind At the top of your blind, on the pin end side, rotate the clear plastic cog anti-clockwise. This will retract the pin away from the bracket, just enough for you to remove that side of the blind completely. Then take the opposite side of the blind out of the bracket.
B
Adjust the hood position and click your blind back in Check that the hood over the chain is at 12 o'clock and the ACMEDA logo is at 6 o'clock.
Gently slot the chain end back into the chain drive bracket.
Then slot the pin end into the pin end bracket, until you hear a click.
C
Check the fit Check that your blind rolls up and down easily and smoothly, and you're done!
All you need is masking tape to fix this one.

A
Unroll your blind all the way down, until you see the bare aluminium tube.
B
Cut a 5 cm strip of masking tape and stick it onto the aluminium tube, on the side you need the blind to go to. Roll your blind back up to check if it tracks straight.

C
Add a couple more layers of masking tape for thickness, until the blind rolls up straight.
If this doesn't fix the problem, please contact us.
A damp cloth will do the job nicely. Just make sure to dab gently rather than rub hard, especially if you have blockout blinds.
No problem, you can do it yourself.

A
Remove your brackets If you have a pelmet, take it down before you start.
At the top of your blind, on the pin end side, rotate the clear plastic cog anti-clockwise. This will retract the pin away from the bracket, just enough for you to remove that side of the blind completely. Then take the opposite side of the blind out of the bracket.
Now you can use your cordless drill with the Phillips head drill bit to remove the screws, using the drill's reverse function. Then take down your brackets.
B
Swap the end caps Lay your blind on a clean floor and pull out each end cap.
Swap them over, then insert them back into your blind. Remember the chain drive end needs to go on the side where you want your chain.
C
Put your brackets and blind back up Then simply repeat from step 3 onwards of this guide to put your blind back up.
If you just put up your new blind, or you haven't closed it in a while, roll it down and let it settle. Time is all it needs to straighten out, and warm weather helps too.
Remember to rotate your blind to different heights as often as you can, to stop new curves forming.
Taking your blinds down is a cinch and there's nothing like a new lick of paint to lift your room.
A
Take your pelmet down First unclip your pelmet, if you have one.
B
Remove your blind Then at top of your blind, on the pin end side, just rotate the clear plastic cog anti-clockwise. This will retract the pin away from the bracket, just enough for you to remove that side of the blind completely. Then take the opposite side out of the bracket.
Now you can either redecorate with the brackets in place, or use a cordless drill with a Phillips head drill bit to remove the screws, using the drill's reverse function. Then take down your brackets.

C
After you've redecorated Simply repeat from step 2 onwards of this guide to put your blind back up.
Don't forget to snap some photos and share your new look with us!